Intake Manifold -Upper
Removal
1.
Disconnect
the battery ground cable.
2.
Drain
the engine cooling system.
3.
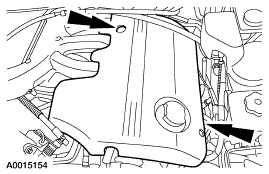
Remove
the engine appearance cover.
4.
Remove
the air cleaner outlet tube.
5.
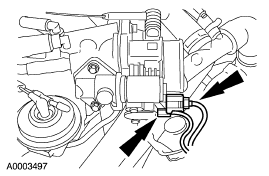
Disconnect
the throttle position (TP) sensor and the idle air control (IAC) solenoid
electrical connectors.
6.
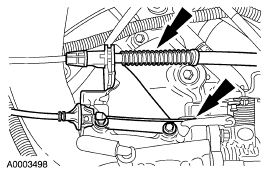
Disconnect
the accelerator and speed control cables.
7.
Remove
the cable bracket.
1.
Remove
the bolts.
2.
Remove
the bracket.
8.
Disconnect
the throttle body hoses.
1.
Disconnect
the coolant hoses.
2.
Disconnect
the positive crankcase ventilation (PCV) hose.
3.
Disconnect
the vapor purge hose.
9.
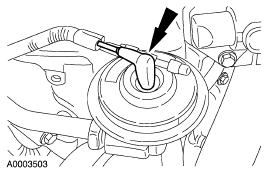
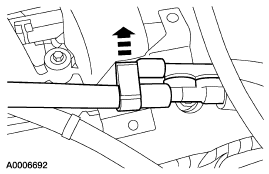
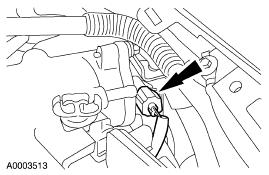
Disconnect
the vacuum hose.
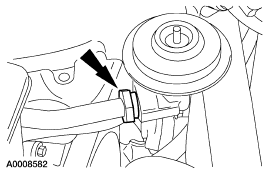
10.
Disconnect
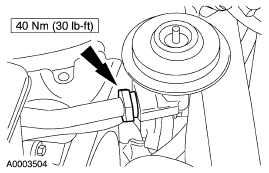
the EGR to exhaust manifold tube nut.
11.
Remove
the cowl vent screen.
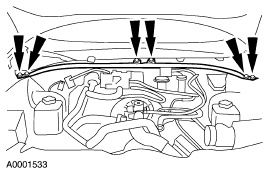
12.
Remove
the brace.
13.
Remove
the vacuum hoses from the mounting bracket.
14.
Remove
the bracket and position the accelerator and cruise control cables aside.
15.
Disconnect
the differential pressure feedback EGR electrical connector.
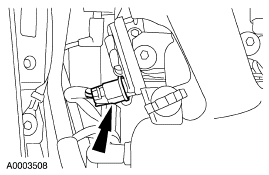
16.
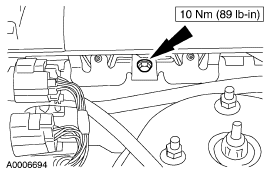
Remove
the stud and nut and position the differential pressure feedback EGR
transducer aside.
17.
Remove
the fuel pressure sensor shield.
1.
Remove
the nut.
2.
Remove
the bolts.
3.
Remove
the shield.
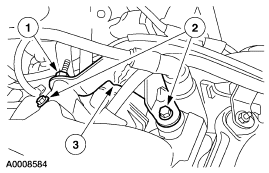
18.
Disconnect
the vacuum hose from the rear of the upper intake manifold.
19.
Disconnect
the intake manifold tuning valve (IMTV) electrical connector.
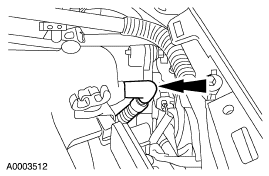
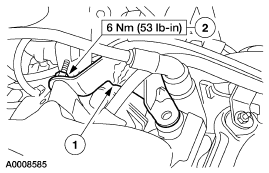
20.
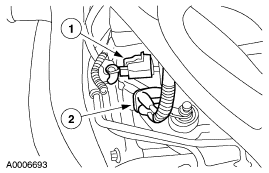
Disconnect
the exhaust vacuum regulator (EVR).
1.
Disconnect
the electrical connector.
2.
Disconnect
the vacuum line.
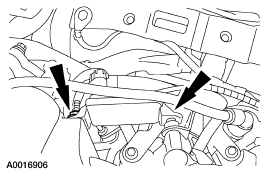
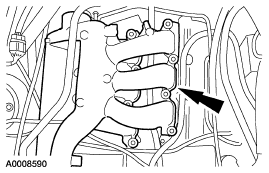
21.
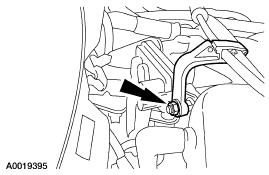
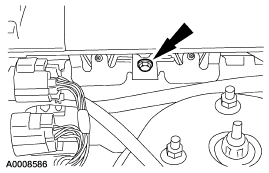
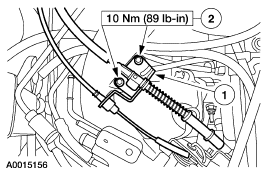
Remove
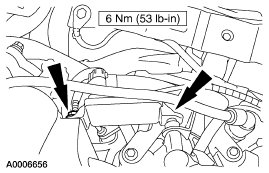
the upper intake support bolt.
22.
Remove
the front intake manifold support bolt.
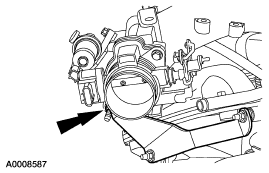
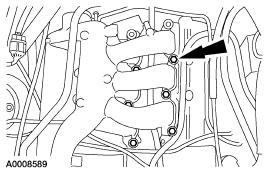
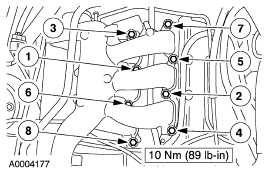
23.
Remove
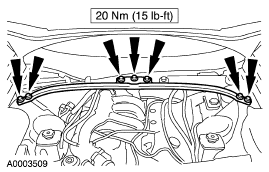
the bolts and the upper intake manifold.
· Inspect the gaskets and discard as
necessary.
Installation
1.
Position
the upper intake manifold and gaskets.
2.
Install
the fuel pressure sensor shield.
1.
Position
the shield.
2.
Install
the nut.
3.
Install
the upper intake manifold bolts and tighten in the sequence shown.
4.
Position
the differential pressure feedback EGR and install the nut and stud.
5.
Install
the upper intake manifold support bolt.
6.
Install
the upper intake support bolt.
7.
Connect
the exhaust vacuum regulator (EVR).
1.
Connect
the electrical connector.
2.
Connect
the vacuum line.
8.
Connect
the intake manifold tuning valve (IMTV) electrical connector.
9.
Connect
the vacuum hose to the rear of the upper intake manifold.
10.
Position
the differential pressure feedback EGR electrical connector.
11.
Connect
the differential pressure feedback EGR electrical connector.
12.
Position
the accelerator and cruise control cables and install the bracket.
13.
Clip
the vacuum hoses into the mounting bracket.
14.
Install
the brace.
15.
Install
the cowl vent screen.
16.
Connect
the EGR to exhaust manifold tube nut.
17.
Connect
the vacuum hose.
18.
Connect
the throttle body hoses.
1.
Connect
the coolant hoses.
2.
Connect
the PCV hose.
3.
Connect
the vapor purge hose.
19.
Install
the cable bracket.
1.
Position
the bracket.
2.
Install
the bolts.
20.
Connect
the accelerator and speed control cables.
21.
Connect
the TP sensor and the IAC solenoid electrical connectors.
22.
Install
the air cleaner outlet tube.
23.
Install
the engine appearance cover.
24.
Fill
the engine cooling system.
25.
Connect
the battery ground cable.