02 center vent removal

NetNathan

LVC Member
Joined
Oct 20, 2012
Messages
21
Reaction score
0
Location
SoCal
The 4 button "Message Center" pod below the center vent louvre slid back into the opening.
I do not know if some type of clip broke or if I can just snap it back in.
I will need to remove the center air vent to get to it.
Do I have to completely remove the center console to do this or will center air vent come off by itself?
Is there a how-to post on this?

2002
LSV8
Sport
 
removing the panel with the buttons and air vents is the very first step in removing the radio.

they just pry straight out rearward (toward the rear of the car)

nothing else has to come apart


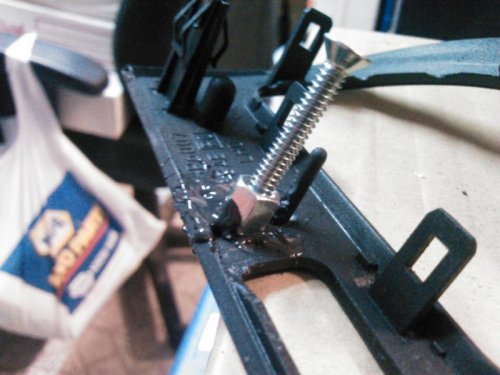
also the panel itself it broke, there are (or more accurate, "there were") places to screw the buttons in to. you will soon find that these bosses have became brittle and have just fallen apart.

so far the best option for repair, other than trying to find a new(er) one, would be to use some epoxy to reinforce or create new bosses for the screws. there have been a few threads on this.
 
also while we are on the subject, when making this repair with epoxy, you will surely want to be proactive and do the same to reinforce the screw bosses for the traction control/advancetrac button in the center console as it is probably about to do the same thing.
 
That's what Loud said to do... it just slides out. Make sure it doesn't flex much as you pull. It's a frail design. You want to pull from the top to get that perpendicular edge, but the clips are only on the bottom.

My screw bosses/standoffs broke. I cut a #10-24 nut coupler on an angle and JB'd the siht out of them to make new mounts.

2015-12-14 20.41.09.jpg

2015-12-14 20.41.09.jpg
 
I might try to fix...
I found the complete center vent with message center....brand new from Ford on EBay for $133.00.

A lot if used ones for less than $50 on EBay also.....
It would be stupid to buy used due to the fact it is about to break anyway.
 
If you get the new one, do what I did. Go ahead and add the epoxy before it breaks.
 
a $4 tube of epoxy and 20 mins is a lot easier to swollow vs. $133 for a new panel from ford. at least for me anyways but if you dont mind throwing money to get a new one, then that is by far the best option.

I second adding epoxy to the new part to keep it from breaking someday (keep in mind, while it may be a "new" part, it has been sitting on a shelf for years now)


regardless, I still heavily recommend using epoxy on your trac button before it also breaks and you have to buy another new panel.
 
I did the same thing on my 2nd LSV8. Later on I just bought a used one off of a wrecked LS from a luxury car salvage yard. The info on fixing it is correct.
 
Ya know, those of you doing the plastic castings could be making a mint making and selling these faceplates.
 
no, they wouldn't... after considering supplies, and time spent, they would be lucky if they ever broke even.

while I'm sure there are a lot of broke dashes out there, I wouldn't think you come across enough people out there needing one to make it worth your time, especially when you factor in how much work its going to take to get it ready after its been popped out of the mold, like sanding and painting it so that it matches all of the other smooth silver pieces. especially when you can buy a brand new one for a little over $100, buy a used one for $50, or fix your own for under $5.
 
Update......
Job done. Breeze to pop out. Used super glue to attach plastic boss to vent face.
Thanks for help all.....
 
super glue isn't going to last too long... the reason it broke is because it is dry and brittle and starting to fall apart, while super glue will hold the parts together for a little bit, the boss is just going to continue to crack and fall apart. this is why we recommend using a thick epoxy, so that it isnt just holding it together but adding strength to the part.
 
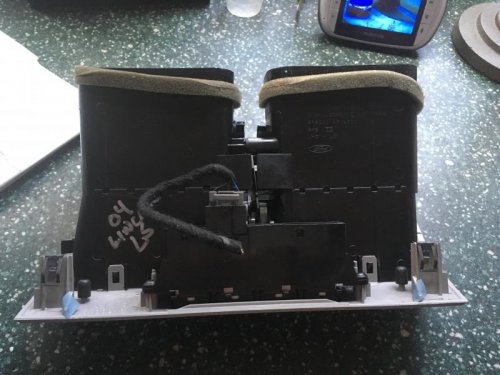
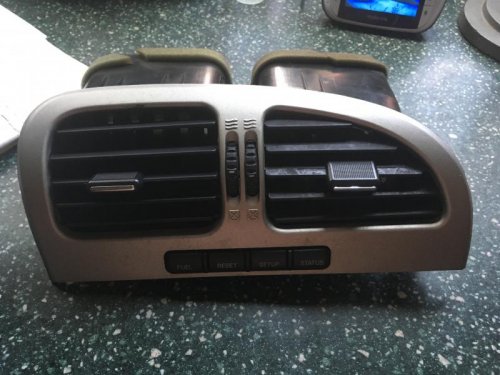
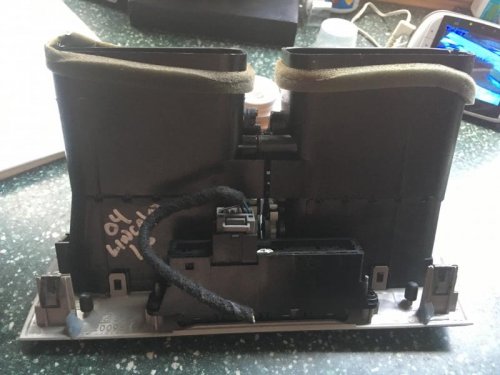
Purchased this replacement part off of ebay. My message center switch is still working and I intend to remove the switch that came with the part and just attach my current switch after reinforcing bosses with epoxy. The reason I am making the change is that the silver frame has cracked. Not sure why this replacement switch was clipped and without 2nd connector. I imagine that the replacement will line with the actual vent and slide on. Hopefully I can just snap back in after changing the switch. Any comment? Thanks.IMG_1135.jpgIMG_1136.jpgIMG_1137.jpg

IMG_1135.jpg


IMG_1136.jpg


IMG_1137.jpg
 
Just unplug the piece of cable they left with the switch bank, and plug the cable from your car into it. There's nothing missing there, they just threw in something extra. I don't know why. It's easier to pinch the clip and unplug than it was to cut the wires.
 
I don't know why. It's easier to pinch the clip and unplug than it was to cut the wires.

I really dont understand this at all, it drive me crazy... there has been a few time I buy something from someone online and they just cut the harness instead of unplugging it.
 
It's been several years since I found it necessary to make this repair. The details are a bit fuzzy, but I THINK I simply epoxy'd the switch panel into the surround. In any case it only took a few minutes and it's been just fine ever since.

KS
 
Well, I haven't confirmed that the new switch panel that came with the replacement part actually works. So I will hesitate to epoxy the unconfirmed switch. Joe suggested that I just attach the car harness to the new switch , and I will, but still wonder and hope it works properly before snapping the whole part back in.
 
If the switches work well mechanically, then they are most likely good. It's easy enough to hook them up and try them though. I would do that first. Be sure to turn the lights on and verify the backlighting of the buttons too.
 
you can add the epoxy at anytime even if the new switches are bad, you don't epoxy the switches in, you just reinforce the bosses that the switch screw into
 
Done. The old unit practically disintegrated on the rt side when I began the removal. The new switch went smoothly through the functions. Snapped right back in. That's an awful light and fragile part for $70+.....Thanks.
 

Members online

No members online now.
Back
Top