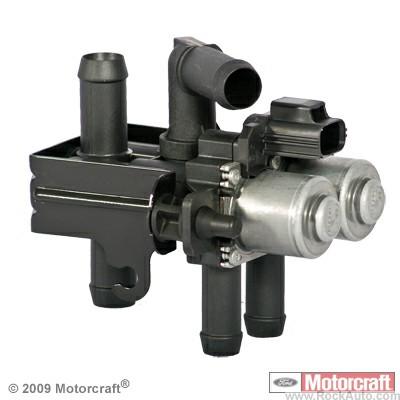
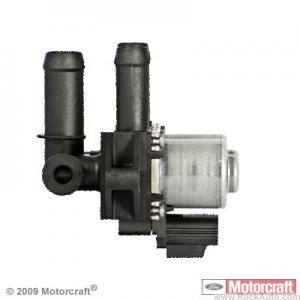
Jim Henderson
Dedicated LVC Member
Hope these pictures get thru. I never posted pics to this site.
This weekend I disassembled the DCCV on my 2004 LSV8. I assume they are similar for other model years but could be WRONG.
I had hoped to disassmble and repair this expensive part but a torn rubber bootie killed that hope. However, I hope the pictures are helpful to others.
Takes maybe 1/2 hour with a couple sockets and Channel locks to remove the hose clamps. Clamps are the hardest part of the job. Remove the air box above the radiator for easier access. Small hands are a plus here. Might need a flat blade screwdriver to help force the hoses off the pipes. Note the Upper radiator hose/pipe is plastic and can be brittle. Don't break it.
Picture 1 is the DCCV after removal from the car. The connector towards the bottom of the picture would be towards the front of the car for reference. I found it easier to remove the two top hoses and then pull the whole assembly with the bottom hose(from the "T" of the upper radiator hose) still attached and with the electrical plug still plugged in. Once the assembly is in your hands, there is a red plastic rectangular slide on the connector that slide up towards the wires which unlocks the connector. Unplug and then take the assembly to the work bench. From the over head view the connector pins from left to right are labeled 3 2 1. Resistance measurements were as follows... 1-2= 14.6; 1-3= 20.1; 2-3=8.6 Ohms. I think this means the solenoids are not shorted but am not sure about the 8.6 being in spec. previous postings mention only two measurements which should be between 10 and 23.
Picture 2 Shows the Valve body separated from the Solenoid assembly. There are 6 Torx T10 screws. There is no other fastener or glue or whatever holding this assembly together. Everything can be disassembled by hand maybe with a little help from a flat screw driver. Note the two pistons/plungers. The plunger body is corroded. I cleaned these later with 600 grit paper and a brass wire wheel Dremel tool. The chrome plating on one was damaged exposing bare steel. The other half is the solenoid assembly. the solenoids are plastic lined in the cavity where the plungers sit. The face of the solenoid body appears to be a rubber flat seal which seals agains the steel plate on the valve body.
Picture 3 shows the solenoid/plunger and seal plate removed from the valve body. The plunger has two sides, one seals against either the plastic cylinder to the left or the rubber bootie around the pointy end of the plunger. The rubber bootie is torn around the bottom which causes water to leak into the solenoid assembly and I assume gumming up the works or leading to a short in the long run. In this view I am compressing the spring of the plunger which cause the cylinder to seal against the rubber cylinder and exposting the "arrowhead" shaped valve.
Picture 4 shows the inside of the solenoid covers and the solenoids. Hard to see, but they were slightly wet and had some clay like crud in them. I cleaned these out with alcohol swabs or paper towels.
Picture 5 shows markings on the side of the Valvebody. They read 1 147 412 175, 2R8H - 18495 -AC, 0 30826 A. Maybe someone might be able to do a search to see if maintenance parts, ie rubber booties, can be found to fix the DCCV. A rubber bootie is surely a lot less than $180, the cost of the DCCV.
Picture 6 shows another set of markings. >PA6T/XT-GF35< Maybe a useful hint for a parts search.
NOTE the top of the solenoid covers shows BOSCH manufactures this part.
If this gets thru I may add more info. Hope the picutures are in order.
Assembly is easiest with the long Rubber hose connected to the bottom outlet before installing in the car.
PICTURES DID NOT MAKE IT. WILL TRY LATER TODAY.
Good Luck,
Jim Henderson
Last edited:


