Gen1 projector and hid diy

BigPip

Well-Known LVC Member
Joined
Feb 12, 2011
Messages
206
Reaction score
8
Location
Central Fl
I sold my immaculate-beautiful Continental and in turn bought this car, a 93 Mark viii. I was excited to have some horse power push by the rear tires not the front. On my evening ride home with the car I , like most of you at night, could not see a thing! I polished the lens and took the cataract off of them and before I got to test them at night I let my wife drive the car to the corner store- BIG MISTAKE. She made me park the car and makes me drive my van if I am out past dark. I'm understand why... Anyways, that is where the my story begins-

On my last trip to the junk yard I picked up an extra set of headlights in really poor shape but I already had my mind gong on what I was going to do. I found someone on HID planet implanting 4 of these projectors in his housings but I was content with just one pair. He was also gong to make a mold but I did a ton of research on sanding the 'Fluting' off the lens so that was the route I was going!
First- remove the lens from housing. I used the heat gun and putty knife method. I have not been sucessful with the oven method on any Ford headlight. These is where the most patients is required, work it slowly and start in a corner. I found working on the lower corner on the grille side was the best place and doing the bottom first. 20140608_195327.jpg
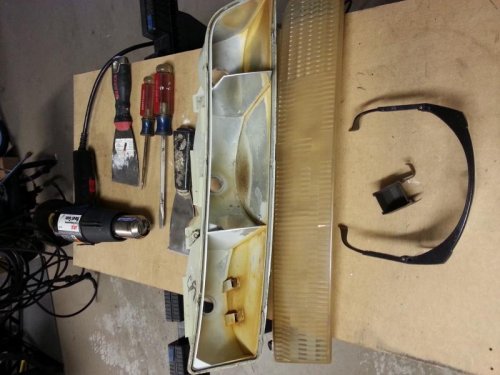
After you have the lens off, heat up the left over glue and remove it from the groove. You want that clean when you go to reseal it. I purchased new glue and recommend it if you go this far.
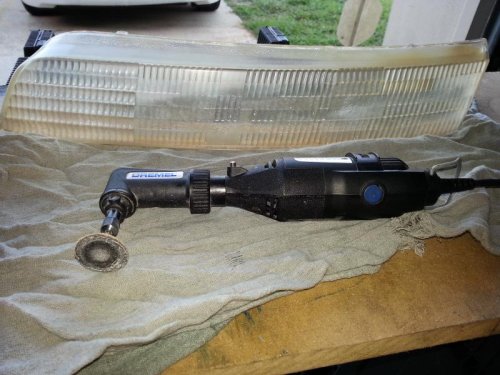
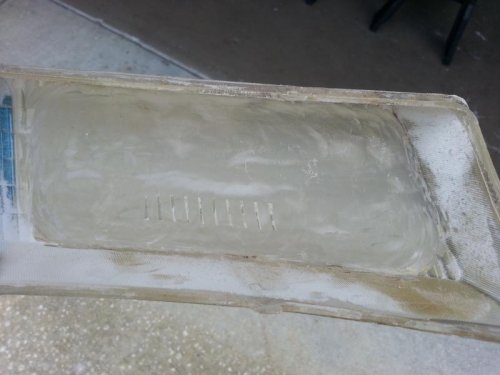
Fluting- I used my dremel and purchased a 90 degree angle for it to make the work easier. Sanded first with 60 then120 next I wet sanded (hand) with 600, 1500 then last with 2000 grit. After that I hit it with a polishing pad to clear it up some. 20140630_122004.jpg
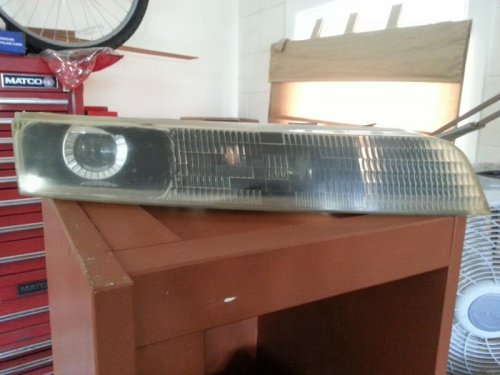
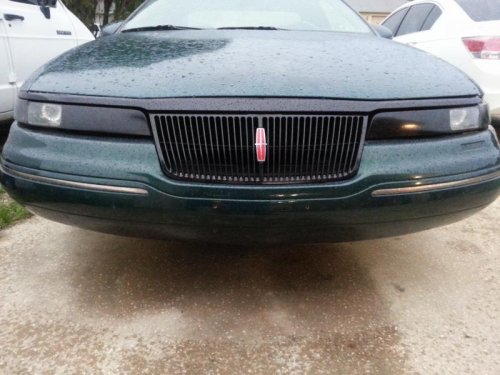
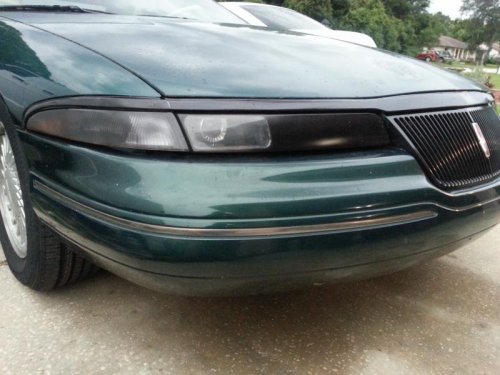
I prefer to color match but since I am only polishing the low beam side I just went all black. The projectors control high beam also so I will not be using that spot any longer anyways.
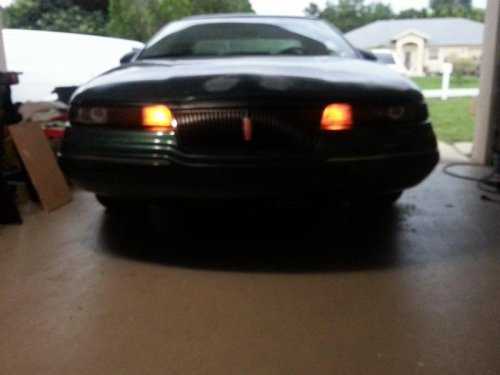
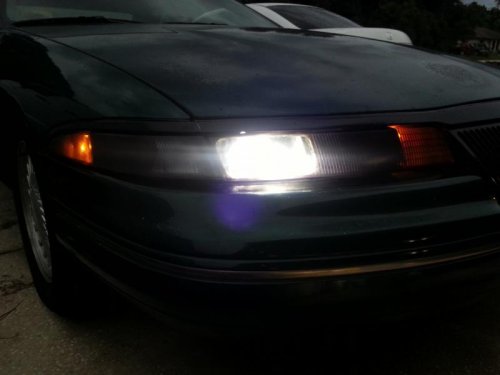
I test fired one light this evening into my garage and WOW my blinkers are no longer brighter than my headlights! I can't wait to finish both of them and take it out at night. 20140630_212813.jpg
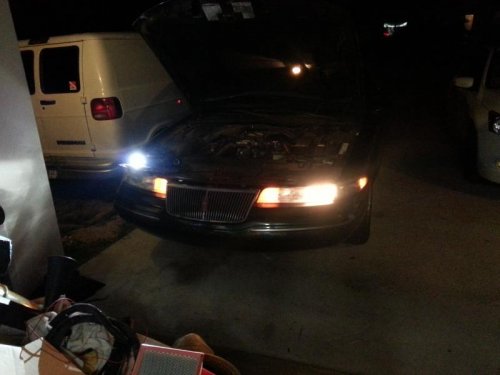
As you can see here, I do not have it mounted but just sitting on the radiator support so that is why it is aimed so highView attachment 828468444
Well, I hope I have motivated some of you, we don't have to live with horrible lighting or search for a set of LSC lights.
*The light kit I used are the morimoto matchbox projectors which are recommended for fog light use only. This is the only set of projectors that have been found that fit in our little space. If you decide to proceed it is at your will and not the recommendation of me. However, you will have 200% more light output. 20140630_214029.jpgView attachment 828468446
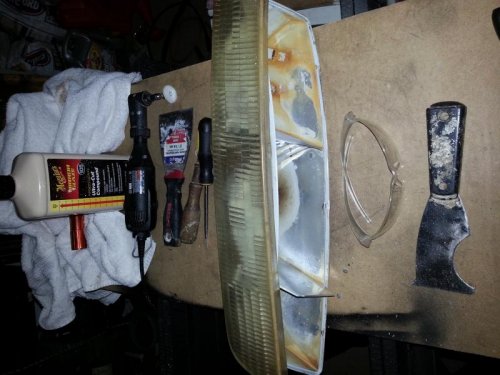
95MARKVIII STARTED IT ALL FOR ME SO I HAVE TO GIVE HIM PROPS!
http://www.hidplanet.com/forums/showthread.php?57919-95-Mark-VIII-quad-matchbox-retro-wip

20140608_195327.jpg


20140630_122004.jpg


20140630_212813.jpg


20140630_214029.jpg
 
Last edited:
I just found a set of headlights at the wrecking yard, and I am looking to get the lenses off so I can polish em real good, and re-chrome the inside of the housing.

What is the best way to get the lenses off, without cutting anything? Is it just a heat gun that is needed? Im going to keep mine stock, but throw in direct replacement hids eventually.

Just like you, my headlights were so bad I couldnt see at night, so I had to use my brights constantly and that is not a good thing to do either. Less than a week after getting my Mark, I almost ran over some drunk bum who was laying flat on his back in the middle of a pitch black alley! That made me wake up and realize I need to limit my night driving as much as possible. Fortunately, this issue was never as bad with my Tbirds in the past (MN12's).
 
Awesome. Can't wait to see it done!

I also have an HID project going on at the same time.
 
What is the best way to get the lenses off, without cutting anything? Is it just a heat gun that is needed? Im going to keep mine stock, but throw in direct replacement hids eventually.
I just used a heat gun and heated up about 6 inches at a time and worked it slowly. You can melt the plastic if it gets to hot so take your time with it.

I will be de-Fluting my second lens tonight and will try to take pictures as I go through it. The lens will also melt from the heat so you have to keep moving and not stay in one spot for to long. You can see in my corners that I cannot get the corners since my sanding disk are round and you might be able to see some white 'hot' spots that I couldn't work out in the corners. I might paint some eyebrows on them to cover that up, it would go with the grille if I decide to paint that black too.
 
They make little triangle sanding disks for the dremel , try one of those for a corner.

http://www.mcmelectronics.com/produ...0&cadevice=m&gclid=CPutt8nwpL8CFTJo7AodHCwAPg

Bet they could even be trimmed a bit for that really tight lower inner corner. Home Depot carries them and the MM11 Hook and Loop pad needed. You'd probably have to modify that pad as well to fit that corner. Worth a shot if youre ever wanting LSCesque headlights without the $300+ price tag


If you get this project down solid, you gonna do it for the GP? If so, how much ya think a set of complete 100% defluted housings with dual projectors in each housing would run??

I really want to deflute my cornering lamps now.
 
I have two sets of base housings sitting in my closet. They're burnt anyways. I may try this just for fun..
 
They make little triangle sanding disks for the dremel , try one of those for a corner.

http://www.mcmelectronics.com/produ...0&cadevice=m&gclid=CPutt8nwpL8CFTJo7AodHCwAPg

Bet they could even be trimmed a bit for that really tight lower inner corner. Home Depot carries them and the MM11 Hook and Loop pad needed. You'd probably have to modify that pad as well to fit that corner. Worth a shot if youre ever wanting LSCesque headlights without the $300+ price tag
I will HAVE to look for those and we just how small they are. It is a lot of work trying to sand the flute down that is why I am not going all the way down it will also let people know it was a custom job too. I will be happy to help out and give advice on the process but I dont know if I am anxious to start another set just yet.

- those pads are to big, anything over 2 inches and it gets to tight to work.
 
20140701_192852.jpg
Now I remember why it took me a couple of days to sand the flutes off! After work on it for 30 minutes straight the lens gets to hot and keeps melting/burning really quick instead of sanding. Here is how far I got on my first run tonight.
DO NOT FORGET TO WEAR A MASK AND EYE PROTECTION! MY glasses are ANSI approved AND anti-fog which has not hold true since the day I bought them.

20140701_192852.jpg


20140701_200228.jpg


20140701_200837.jpg
 
20140702_171448.jpg
I have about another 35-40 minutes in it, can you tell which area is most difficult?

20140702_171448.jpg
 
Mark viii removing fluteing from headlight.jpg
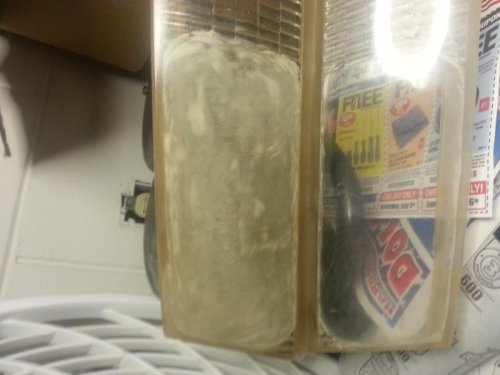
I hate to say it but I probably have at least 4 hours in this one lens so far. The hard part is over now! This is the result of sanding down with 60 grit the slowing the dremel down and hitting it with 120. Next will be hand sanding with 600, 1500 then finishing up the sanding with 2000 grit. I will do this on both inside where I sanded and outside. Then of course the polishing will be the final step on the lens.

Mark viii removing fluteing from headlight.jpg
 
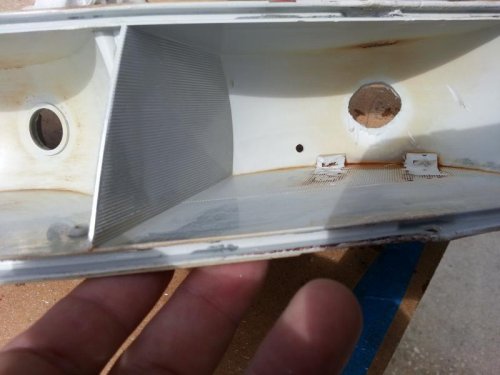
Today I finished up my 2nd. Light, sanding, polishing and painted the housing. I took this picture to show what needed to be trimmed back and the hole needs to be opened up
20140713_100830.jpg
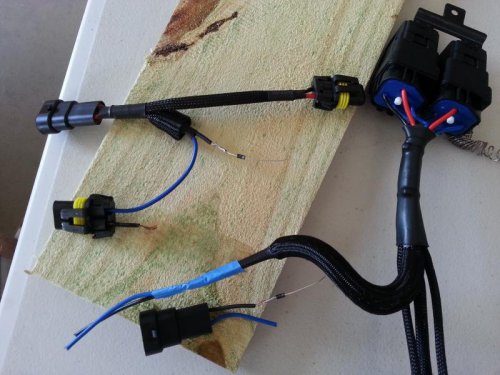
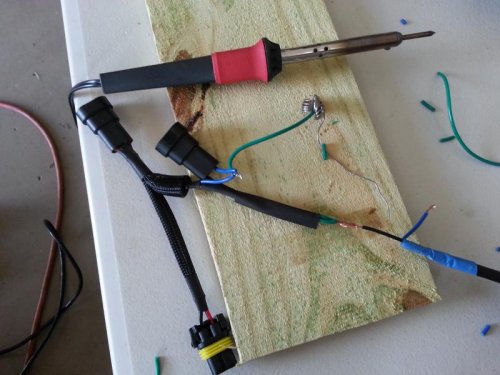
After that I had to start on the electrical since the low beams turn off when the high beams are turned on. I hate electric- I can and will do it but I always take my sweet @$$ time because I hate it so much! Anyways, I used a harness that came with the kit and modified it for my use. The Barnes I used is a splitter for the high beams so you can use both the hid/projector and factory high beam but I am only planning on using the projectors. I spliced a diode (one way polarity) from the high beam and low beam and wired it up to the hid box so I will always have power on both low and high. If you follow my steps make sure when you put your diode on the high beam side to do it AFTER your secondary plug to the high beam switch on the projector.
20140713_121606.jpg
20140713_124335.jpg
If you look closely you may wonder why, and I know some of you will ask, I am splicing into the black wire cor the dioide- to answer the question, the harness is colored black power , red/blue negative. Seems backwards to me but my anal self with electrical work checks everything 26-283 times before starting any project.

Tonight I hope to put the light on the car and make sure the lights are in the buckets level so I can close them up and mount them.

20140713_100830.jpg


20140713_121606.jpg


20140713_124335.jpg
 
20140713_140738.jpg
I still have a couple things up my sleeve but here it is sitting in place
20140713_142812.jpg
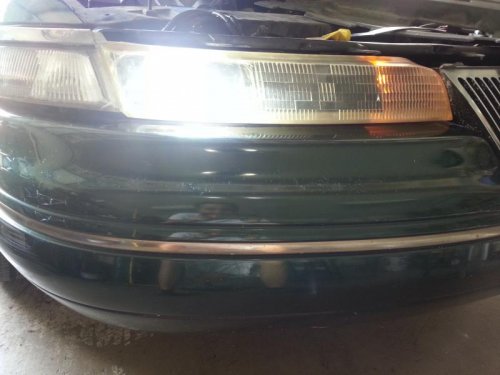
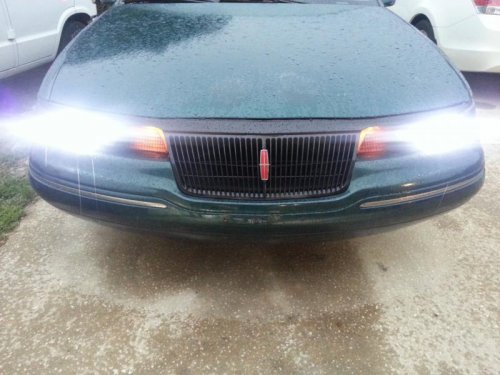
Working! High beam working perfect too!
Time to align them and try them at night :D

20140713_140738.jpg


20140713_142812.jpg
 
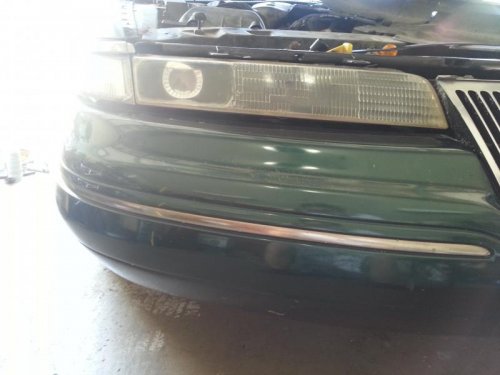
Well, I guess you can say I am 95% done now but it is up and functional. All that is left to do is buy a couple of pieces to turn off the check exterior lights display. I realize the route I went is not for everyone but I personally love the way it turned out.
Mark viii projectors blacked out.jpg
Mark viii projector corner.jpg
20140714_194130.jpg
Mark viii projectors ON.jpg
Mark viii projectors corner ON.jpg

Mark viii projectors blacked out.jpg


Mark viii projector corner.jpg


20140714_194130.jpg


Mark viii projectors ON.jpg


Mark viii projectors corner ON.jpg
 
I was just thinking about that- thats actually why I just got back on LVC to look into what wire it is.
 
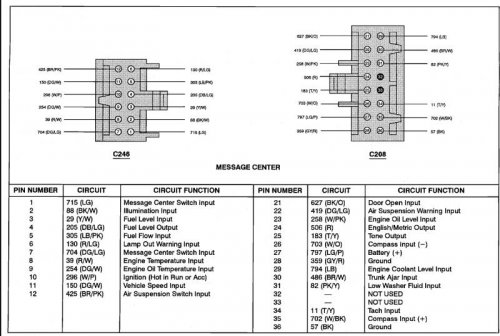
Just cut the wire, easy to do but I can't remember right now which one it is. Kudos to you for all your hard work. There's several different ways to increase light output on these cars, but it takes an assload of time for any method. I will be interested to see if you have enough light output to not need high beams.
 
msg_center.jpg
According to this diagram it is pin #6. Will I find this harness behind the glove box also?


Thanks Epwillis, that site is very helpful!

msg_center.jpg
 
Wow..really nice work. I tried the oven method with housings I had...melted the crap out of them! My wife said no more! I found two housings that had halfway decent chrome and had the lenses polished. But I still drive at night with my "brights". Rewiring so both lamps are on at the same time I have thought about doing also but your solution is definitely superior!
 
Night driving is DRASTICALLY IMPROVED!!! 100% worth all thework work! The high beams leave some to be desired. I would recommend keeping factory high beams if possible. I haven't decided If I am going tip put them back in yet our not.
 

Members online

No members online now.
Back
Top