Suspension overhaul

What's the deal with only tightening the bolts on the UCA front/rear when the car is lowered back down,
what would happen if say the rear UCA were replaced and tightened in place before the car was lowered back onto the ground.

I looked at it and to me it just seems like a large bolt through a hole in the metal bushing surrounded by rubber, should be able to move around whether the car is raised or sitting on ground level.

why is this step necessary and what would happen if it wasn't done this way?

Any insight on this?

That's what I thought after tightening down the nuts on the passenger side. I tried lowering the arm onto the knuckle and it wouldn't budge!!!
 
but the control arm bolts must be tightened only when the car is off the stand back onto the ground?
I replaced both my rear UCA and they are tightened in place, new shocks and springs went in, car is still up on jacks. Should I be loosening them up, lower the car off the jacks and then tighten in place?

I wouldn't worry about it. The factory arms did swing freely. I think the bushing needs to loosen up a bit. I also had to "encourage" the ball joint stud into the right angle to engage the knuckle.
 
So..... You got me thinking so went out for a test drive. The suspension worked flawlessly so I figure the bushings were a just stiff.
 
So the upper control arms don't like it when the LS is lowered. I just noticed tears in the boots of my upper control arms. I doubt mileage is an issue as the boots on my wife's LS look like new at 68K miles. I squirted some Shoo Goo on the tears so we'll see how long before I have to replace the arms.....
 
So the upper control arms don't like it when the LS is lowered. I just noticed tears in the boots of my upper control arms. I doubt mileage is an issue as the boots on my wife's LS look like new at 68K miles. I squirted some Shoo Goo on the tears so we'll see how long before I have to replace the arms.....

I suspect that when you lowered your car, an extra one-direction rotational twist was loaded into the boots. This twisting loads up the boots more and causes them to fail faster. If the boots did not rotate themselves from their old "neutral position" to the new lowered position. By hand see if you can get the boots to twist to where they feel like there is no rotational load on them. If this doesn't work, then you may have to loosen and then tighten the bolts holding the a-arm bushings to their mounts. This will allow the the bushing to rotate slightly to where there is no pre-load on the boot. I've found that the new boots on new a-arms will rotate by themselves to the neutral postion, but as the boot ages, it gets stuck to the OD of the bushing and wont self align.
 
Last edited:
interesting!
I'm going to look into this a bit further this upcoming weekend.
 
censored.gif


http://deneau.info/ls/s6x~us~en~file=s6x42006.htm~gen~ref.htm

CAUTION: Do not tighten the suspension upper arm-to-subframe nuts until the suspension is at curb height. Failure to do so can cause severe damage to the bushings resulting in poor ride quality and handling.

Position the arm on the subframe and install new suspension upper arm-to-subframe nuts and bolts. Do not tighten at this time.


~ did NOT take a measurement prior to jacking the LS up and removing the wheels, kind of defeats the point as the Eibach springs went in and would sit at a different ride height anyhow.


How to resolve? Anyone?

Is this really a big deal, Anyone ever changed out the rear UCA and just simply tighten them down while on jack stands and then lowered it onto the ground without ill affect?

should I really loosen them back up and retighten after I get it onto the ground, seems too hard to get up in there once it's back on the ground with the wheels on.


EDIT: Only on the rears does the workshop manual mention to do this, no mention of this for the fronts.
 
There are different types of bushings in control arms. Rubber style bushings where the rubber is vulcanized to an outer sleeve and inner rod always need to be tightened down in a neutral position so that they can travel up and down evenly. If they are tightened with the bushing in the down position then they will get over-flexed in one direction and wear out earlyor fail a lot quicker.
If it is a mono-ball style bushing where the inner ball can rotate smoothly then it doesn't matter what position you tighten them in, but as stated earlier, you have to twist the boots so that they are in a neutral position, otherwise they will fail early as LS4me has seen in his boots.

I hope this makes sense.

Joe
 
.......otherwise they will fail early as LS4me has seen in his boots..

The boots that failed were the ones protecting the UCA ball joint. What I ran into was tightening the front UCAs "froze" them so I couldn't lower them onto the knuckle. What I did was kept the nuts loose, attached the ball joint stud to the knuckle and then tightened the UCA nuts in the engine compartment. This while on jack stands.......
 
... where the rubber is vulcanized to an outer sleeve and inner rod always need to be tightened down in a neutral position ... I hope this makes sense.


Yup, I will loosen first, then retighten after I get the vehicle back onto the ground.

thanks!
 
That seem unusual for the UCA boots to fail that way. They typically rotate easily because the spring wire clamps tension them tight enough to hold the boots on the lips, but loose enough to rotate. Could it be because if the car is lowered, angle the ball joint sits at pinches them at more of an angle so they don't rotate and twist instead?

The boots that failed were the ones protecting the UCA ball joint. What I ran into was tightening the front UCAs "froze" them so I couldn't lower them onto the knuckle. What I did was kept the nuts loose, attached the ball joint stud to the knuckle and then tightened the UCA nuts in the engine compartment. This while on jack stands.......
 
That seem unusual for the UCA boots to fail that way. They typically rotate easily because the spring wire clamps tension them tight enough to hold the boots on the lips, but loose enough to rotate. Could it be because if the car is lowered, angle the ball joint sits at pinches them at more of an angle so they don't rotate and twist instead?

Yup. The boots on my wife's never lowered LS are just fine.
 
Shocks...need to be removed or the bolts won't come all the way out. Degas bottle...needs to be loose, not removed. Brake booster....doesn't need to be removed.

Alright, I don't get it. I'm trying to do this job now. I loosened the degas but that didn't help me at all. There's no room to put a wrench between the degas and brake reservoir. Am I missing something? Cowl is off. The service manual says loosen the reservoir so you can get to the master cylinder nuts and move it aside. Wouldn't removing the reservoir just dump all the fluid out the bottom? I have no idea what's in the master cylinder to booster connection. I'm lost. Any help would be appreciated. I also found out if you're going to use a regular socket on an external Torx, it needs to be a 12pt or else it will just strip it, regardless of size or SAE/metric units

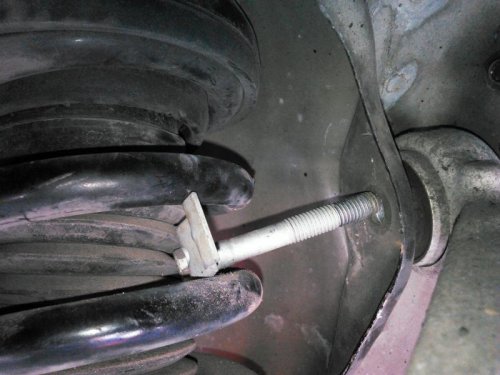
Passenger side was fine. I couldn't get the lower shock bolt loose, so I trimmed down the metal plate welded to the bolt head and slipped them between the springs.

2014-09-18 14.36.40.jpg

2014-09-18 14.36.40.jpg
 
You probably can't get a socket in there, but I had no problem getting a wrench in there. I did have to maneuver just right... I didn't loosen or remove anything on the driver's side. I could also have done it without removing anything on the passenger side either....
 
I got a 12pt wrench in between the master cylinder and the brake lines, but couldn't rotate it far enough to get the nut to the next position. Its raining now but I'm think I might be able to turn the bolt back a little bit. I'll try again tomorrow
 
I got a 12pt wrench in between the master cylinder and the brake lines, but couldn't rotate it far enough to get the nut to the next position. Its raining now but I'm think I might be able to turn the bolt back a little bit. I'll try again tomorrow

Wratcheing wrench........
 
Wratcheing wrench........

I guess it's time to buy the Metric half. Unfortunately, I only currently have 1/16" increments in SAE.

I got the nut off with a combination of a 15mm offset 12pt wrench, a 5/8" 12pt/box end wrench, and a 150mm angled spanner, alternating between a.) between the master cylinder and brake lines, and b.) between the brake lines and valve covers. 5 wrench positions and 2 approaches means 10 combinations of stick it in and try it out. Forget that, assuming a properly sized ratcheting wrench has more than 12 ratchet points per revolution, I'll be buying a wrench set tomorrow.

I do actually have a set of metric ratcheting wrench, but they're the kind of box end that's cut weird and only move 1/6 of a revolution, as opposed to a really compact ratchet mechanism.

Oy. My VCG replacement looks like a cake walk now.
 
I got it done. Remove the wipers and cowl and stick the wrench through the two spots I mentioned above. The ratcheting wrench helped things move along faster. Everything went back together or put away in under an hour. I had some trouble slipping the bolts between the coils on the front, but jacking up the knuckle a little or unbolting the top and removing the sway bar end link gave me enough leeway to find the right spot.

Thanks again for the help
 

Members online

No members online now.
Back
Top