'02 V6 Sport 90k miles
I hit a speed bump too fast several months ago, and I noticed a clunking sound over bumps at low speeds ever since. I gather (from this forum) that it's probably the sway bar bushings, so I decided to tackle it. I ordered the bushings from rockauto, I think probably the Jag part, as I have the sport (30mm) bar, although it came up using my car's make/model. They're rubber w/ some kind of fabric liner (presumably to slide w/out grease, as required by the poly bushings).
I knew from the other write-ups (thanks to everyone else who posted, especially the threads advising to attack driver side front bolt from the top, and the one showing the diagram illustrating the two bolts for the DCCV bracket), that it was gonna be a bear, but what the hell. However, now that I'm into it, I don't know how anyone could get it done in a couple hours (as I've seen quoted by a couple posters). I'm probably 5-6 hrs into it, and I only got the driver side done. It's much worse than taking off the manifold to do the valve cover gaskets or coils. If I knew a shop would do it for like $150 (as I've seen others quote), that's what I'd recommend.
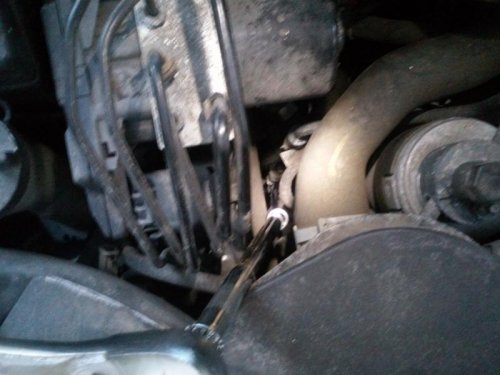
Granted, I've had some front end damage that cramped the working space (it's a lot tighter now changing the oil filter), but boy I wish the engineers woulda kept those hoses a couple inches towards the outside on the driver side! Anyways, I removed the air filter to get the top driver's side bolt (it's pretty obvious, but here's a pic showing how to remove the filter for completeness).

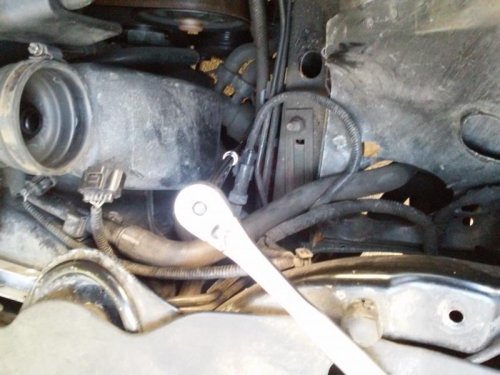
I used two extensions (one wobble) and a universal joint to get the top bolt. The bottom required a 1/2 inch (or 13mm) box wrench (I didn't have a ratcheting wrench, so I just broke it loose w/ the wrench and then was able to get a 1/4" drive socket wrench on the bolt w/ a short wobble extension).
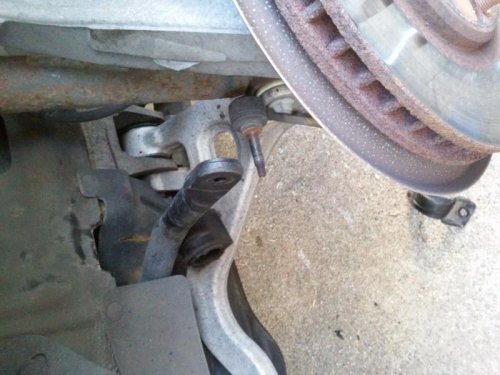
However, after I got the old bushing off, it was impossible to get the new one on. Couldn't slide it on from either side or rotate it into position (because of the corners on the flat bottom). I saw that lsbit did the job using ramps, but maybe he had the standard (skinny) bar. So while I first tried using ramps, I had to put both wheels off the ground so I could detach the bar (you need to hold the bolt w/ a socket or wrench and crank the 15mm nut off). As shown in the pic, I propped the bar up w/ the old bushing to make enough space to get the new one on.
This is where I'm at so far, but I'm posting now because I have a question about the nut that holds the bar to the knuckle or whatever it's called. When I replaced it, it looks like there is some kind of nut lining that came out.
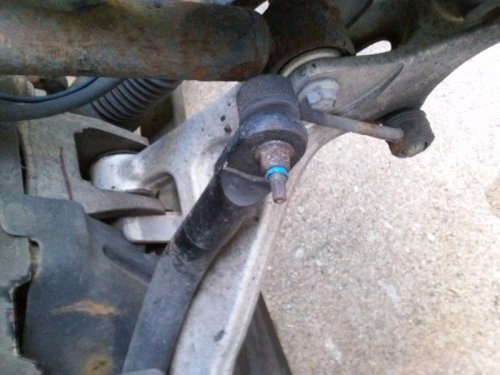
I'm guessing that the bar is supposed to swivel around the bolt freely, so I shouldn't crank it down tight. But I'm not really sure how it's supposed to work. Do I need a new nut? Or should I put some loctite on it?


I hit a speed bump too fast several months ago, and I noticed a clunking sound over bumps at low speeds ever since. I gather (from this forum) that it's probably the sway bar bushings, so I decided to tackle it. I ordered the bushings from rockauto, I think probably the Jag part, as I have the sport (30mm) bar, although it came up using my car's make/model. They're rubber w/ some kind of fabric liner (presumably to slide w/out grease, as required by the poly bushings).
I knew from the other write-ups (thanks to everyone else who posted, especially the threads advising to attack driver side front bolt from the top, and the one showing the diagram illustrating the two bolts for the DCCV bracket), that it was gonna be a bear, but what the hell. However, now that I'm into it, I don't know how anyone could get it done in a couple hours (as I've seen quoted by a couple posters). I'm probably 5-6 hrs into it, and I only got the driver side done. It's much worse than taking off the manifold to do the valve cover gaskets or coils. If I knew a shop would do it for like $150 (as I've seen others quote), that's what I'd recommend.
Granted, I've had some front end damage that cramped the working space (it's a lot tighter now changing the oil filter), but boy I wish the engineers woulda kept those hoses a couple inches towards the outside on the driver side! Anyways, I removed the air filter to get the top driver's side bolt (it's pretty obvious, but here's a pic showing how to remove the filter for completeness).


I used two extensions (one wobble) and a universal joint to get the top bolt. The bottom required a 1/2 inch (or 13mm) box wrench (I didn't have a ratcheting wrench, so I just broke it loose w/ the wrench and then was able to get a 1/4" drive socket wrench on the bolt w/ a short wobble extension).
However, after I got the old bushing off, it was impossible to get the new one on. Couldn't slide it on from either side or rotate it into position (because of the corners on the flat bottom). I saw that lsbit did the job using ramps, but maybe he had the standard (skinny) bar. So while I first tried using ramps, I had to put both wheels off the ground so I could detach the bar (you need to hold the bolt w/ a socket or wrench and crank the 15mm nut off). As shown in the pic, I propped the bar up w/ the old bushing to make enough space to get the new one on.

This is where I'm at so far, but I'm posting now because I have a question about the nut that holds the bar to the knuckle or whatever it's called. When I replaced it, it looks like there is some kind of nut lining that came out.

I'm guessing that the bar is supposed to swivel around the bolt freely, so I shouldn't crank it down tight. But I'm not really sure how it's supposed to work. Do I need a new nut? Or should I put some loctite on it?
Last edited:

