The "NO... just no..." Build Thread.

Please, enlighten me! I have no idea what 11/22/63 is.

Book- travel back in time to the same point but each time you travel back, the world tries to stay the same even though you try and change it. Sometimes you mess everything up, sometimes you barely affect it. Each time you do something, a completely unrelated thing goes to hell.

Car- each time we end up at the same spot after these crazy events. No matter how hard we try, the world tries to not let this change happen.

Lol, I even enjoyed that book and didn't get the 11/22/63 comment. Thought the reference was maybe towards the JFK presidential Lincoln, or the A. Lincoln/JFK conspiracy theories, etc. Totally get it now
 
As I digress into madness, the absurdity of this build personifies a never-ending maze of complexity.
IE- I took a plane ride!

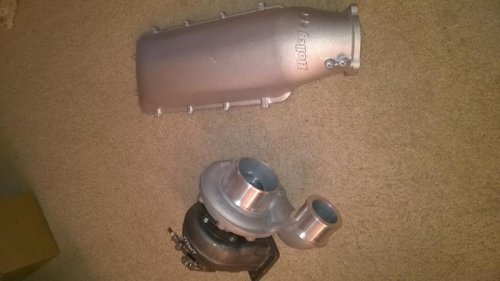
The next hurdle to stumble over is mating the LSXXXXXXX Holley upper intake manifold to the 1uz lower intake runners. This was directly stolen with full permission from Steve-
FF65ACF4-6E56-48F6-BD23-D09D02022D1A.jpg

Midway through this build, he made that RA21 and we instantly knew it must be copied. He has many tools, machines, and fancy things; where as we have none of that. This began the journey to build the bastardized Steve Mod.
Intake manifold acquired (from earlier pic).
WP_20160119_001 1.jpg
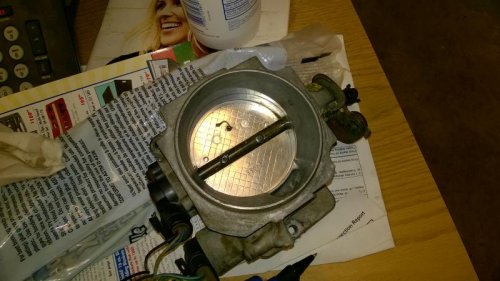
Throttle body off of a Chevy VORTEC in the local treasure trove (junk yard).
WP_20160120_14_07_29_Pro.jpg
The need was for a drive by cable set up and all of the throttles that match the intakes 4 bolt pattern are drive by wire. The one company that makes a drive by cable with the matching bolt pattern was $350 and had a TPS that failed all the time.
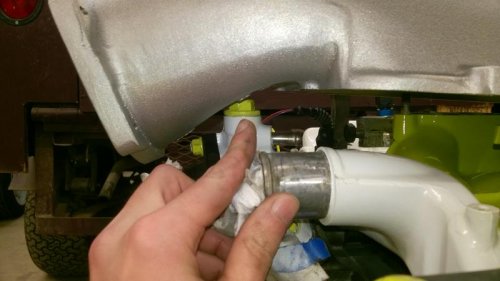
Crab and I measuring up the almost made to fit upper and lower.
WP_20160120_09_34_38_Pro.jpg
WP_20160120_13_39_39_Pro.jpg
It was determined that the services of Mike were needed to engineer an adapter. Hastily no true measurements were taken (this will undoubtedly prove to be a poor decision).
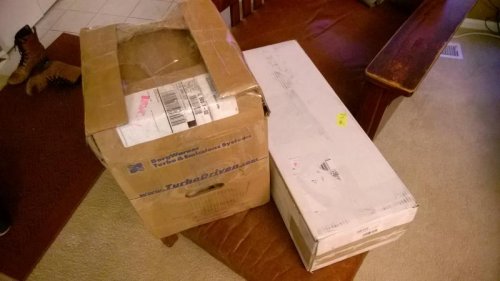
I have one day off between work and school each week, and that day is Wednesday. I drive so much for work and school that I sent a message to Mike (who lives in Kalamazoo) that I was flying out the next day. I overnight the two packages containing the throttle body and upper/lower manifolds via FedEx (shipped at 2:45pm Tuesday, showed up 10:30am Wednesday).
WP_20160127_17_56_05_Pro.jpg
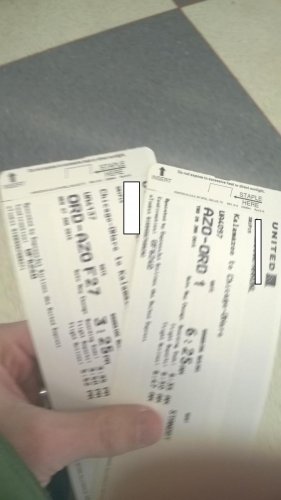
I get my two tickets to Kalamazoo.
WP_20160127_14_55_33_Pro.jpg
Wait for a quick employee bus.
WP_20160127_14_40_26_Selfie.jpg
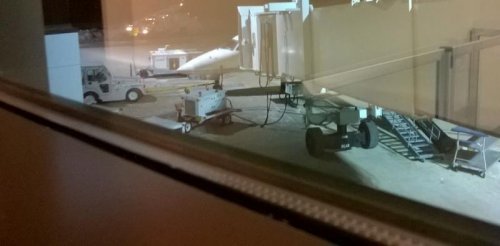
Wait 10 minutes for the EMB145 that departed 20minutes early.
WP_20160127_15_31_28_Pro.jpg
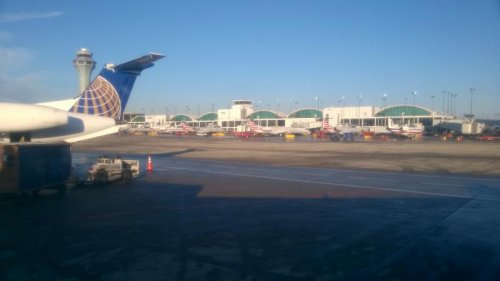
Bye O’Hare.
WP_20160127_15_55_07_Pro.jpg
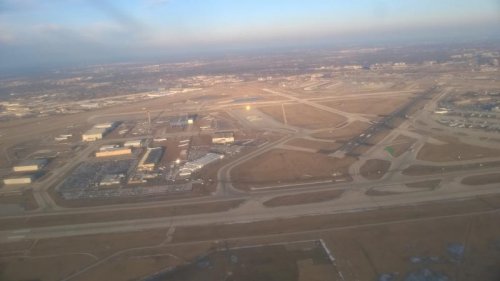
Hello Michigan- 20 minutes later.
WP_20160127_16_11_05_Pro.jpg
Arrive at Mike’s place way early to discuss the multiple ways to approach this adaptation of the three parts. Chow down on some homemade pizza with some good but could be improved upon crumb. Check out the progress of the MetSHO build at Jamie’s new house. Watch some drifting videos: https://www.youtube.com/watch?v=PfODykKzmIY
Wake up before Mike had to work the next day and jump on a plane back to O’Hare.
WP_20160128_06_07_41_Pro.jpg
This was the obvious course of action for this project.
Total cost $35.00 for tolls, gas to O’Hare, and overnighting the packages.
Success!

WP_20160119_001 1.jpg


WP_20160120_14_07_29_Pro.jpg


WP_20160120_09_34_38_Pro.jpg


WP_20160120_13_39_39_Pro.jpg


WP_20160127_17_56_05_Pro.jpg


WP_20160127_14_55_33_Pro.jpg


WP_20160127_14_40_26_Selfie.jpg


WP_20160127_15_31_28_Pro.jpg


WP_20160127_15_55_07_Pro.jpg


WP_20160127_16_11_05_Pro.jpg


WP_20160128_06_07_41_Pro.jpg
 
Are the timing belts always exposed like that? Seems... sketchy
 
Are the timing belts always exposed like that? Seems... sketchy

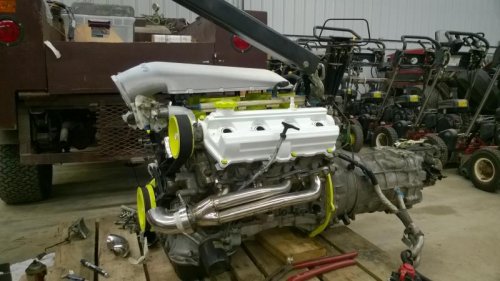
There's no major issue with running a timing belt like that. Nearly everyone does and then just puts a hole on the bottom of the plastic by the crank pulley for debris to fall out of. With the turbo set-up, I can't run the plastic. There's no room and the plastic will just melt.
 
Oh, ok. So is it not stock like that? What's the advantage for others? (Besides you having a turbo there)
 
Updates to this? Tons of tiny stuff that is 3/4 done but doesn't look like anything in pictures. I work on this every Tues-Thurs for about 4 hours. At some point I'll have something substantial enough to post a cool picture of.
Picture from a couple weeks ago with the turbo mounted.
turbo%20engine_zpsbkjwvpvz.jpg
 
Successful run to the junk yard helped me to acquire a perfect condition hood, wheel well mud guard so the shredded tires don’t destroy the fuel filler neck, a rear bumper, and various other parts that were needed. Rear bumper was put on for the first time in about 5 years. After that I leveled out the Stance. If anyone is wondering how long the SS brake line upgrade and pad replacement takes- 4 years. It takes 4 years from start to finish.

WP_20160313_21_21_15_Pro.jpg

Looking at the list of items that need completion, it was determined a boost to our immediate motivation level was needed. What is something that could help fill this great void in my heart and in my car?

WP_20160313_20_08_42_Pro.jpg

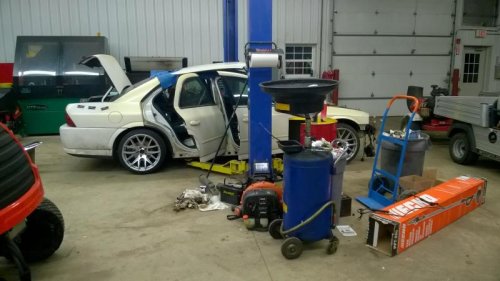
Maybe we could throw this V8 charred hunk of junk into this 4 door fire custom patina’d pipe dream…. Let’s see!

WP_20160313_21_47_43_Pro.jpg

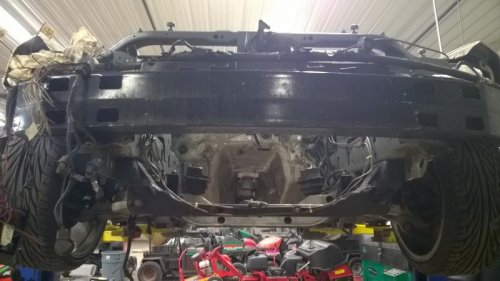
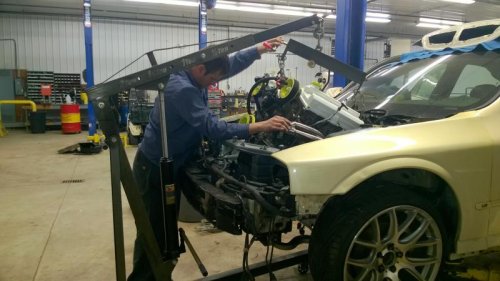
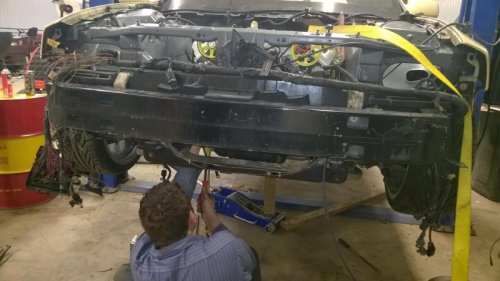
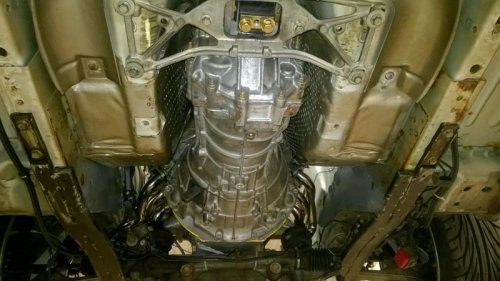
Between many awkward angles, shoving matches, pry bars, and me lying on my back while maneuvering the trans with my feet; stuff actually happened.

WP_20160313_22_42_19_Pro.jpg

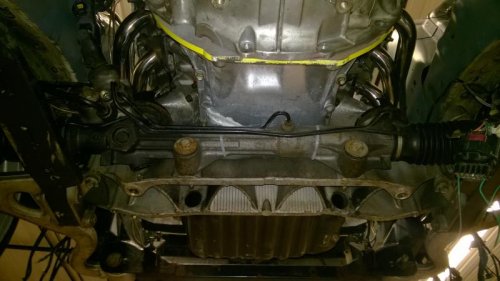
Passenger header clears by ¼” with some more space on the driver’s side. I’ll work on the bolts and subframe to get more clearance to the strut tower. It fits great, just not perfect. The engine sits a little higher than we thought, so it will be interesting how this Holley intake looks. I do NOT want a throttle body and intake sticking out of my hood (I’m tacky but not that tacky).

So you are also putting a 350Z transmission into a Lincoln LS with a 1uz? Make sure you order the Energy Suspension 3 1108g for a Chevy/GMC truck.

355-3-1108g.jpg


It will bolt up dead center to the LS Trans Cross member and works with the Nissan bolt pattern. Simply add a support bar that should take 5-10 minutes to complete. Hardest part will be modding the shifter bracket, but Crab started this as I was figuring out the trans mount/cross member situation.

WP_20160314_00_23_02_Pro.jpg

WP_20160314_00_23_10_Pro.jpg

This week is going to be busy since I am working an extra day Wednesday (so 13 days without a full day off between work and school…). But progress is progress.
Next to tackle is wiring and turbo piping.

WP_20160313_21_21_15_Pro.jpg


WP_20160313_20_08_42_Pro.jpg


WP_20160313_21_47_43_Pro.jpg


WP_20160313_22_42_19_Pro.jpg


WP_20160314_00_23_02_Pro.jpg


WP_20160314_00_23_10_Pro.jpg
 
Respect for a serious build, an ungodly abundance of ambition, and a well written entertaining thread. You rock.
 
I'm just here to drop my jaw about that fire that almost killed me reading.

Amazing build and patience man.

Major Props to you. I'll be looking for this finished product!
 
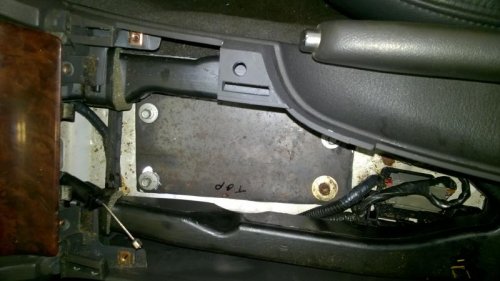
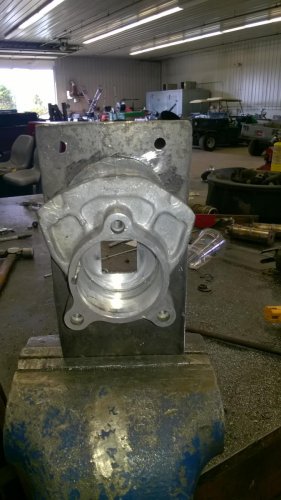
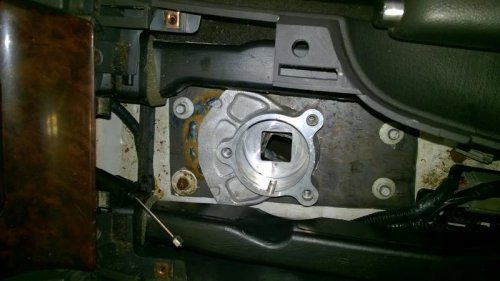
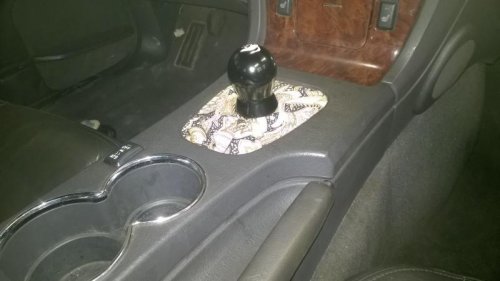
In order to install the driveshaft, the shifter had to be installed. Originally we planned to shorten the 350z housing extension on the transmission. Instead it was determined by Crab that cutting the mount off completely and affixing it to the transmission tunnel would be best.

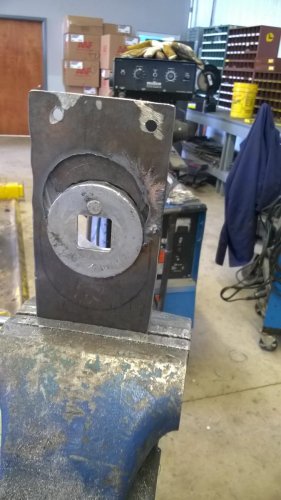
Take cardboard for plate mock up. Plasma cut and test fit the plate.
WP_20160315_12_30_18_Pro.jpg

Cut phallic shaped hole into the for shifter recess to be “hammer fitted” into.
WP_20160315_13_52_57_Pro.jpg

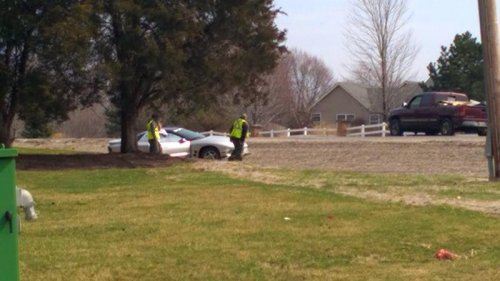
Walk out and look at crashed F-Body of drunk lady.
WP_20160315_13_56_24_Pro.jpg

Plasma cut out a crescent moon from the larger hole’s left overs for secured fit.
WP_20160315_13_52_52_Pro.jpg

Weld. Install into transmission tunnel.
WP_20160315_14_10_43_Pro.jpg

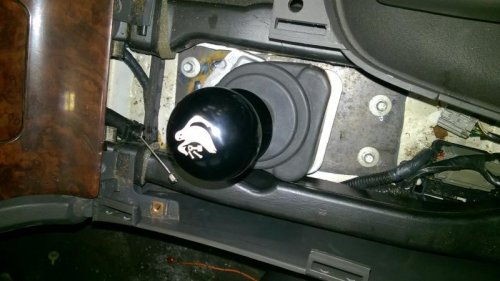
Admire with Touge Factory custom laser etched Charnal House shift knob.
WP_20160315_14_11_03_Pro.jpg

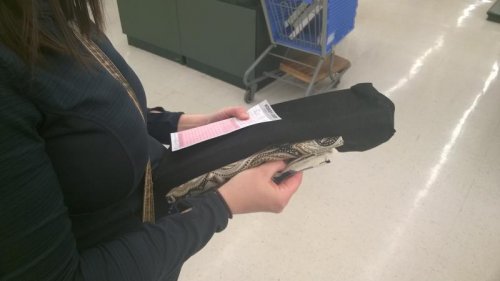
Convince tired and preggerz wife to make cuzzztum shift boot (two options: black suede and interior matching paisley).
WP_20160315_18_01_41_Pro.jpg

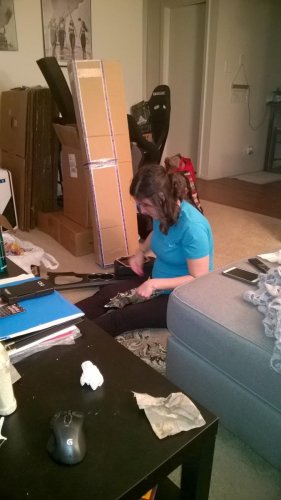
Get yelled at for taking picture (we are getting ready to move, pardon the mess).
WP_20160321_20_37_11_Pro.jpg

Upper portion is complete.
WP_20160322_13_24_47_Pro.jpg

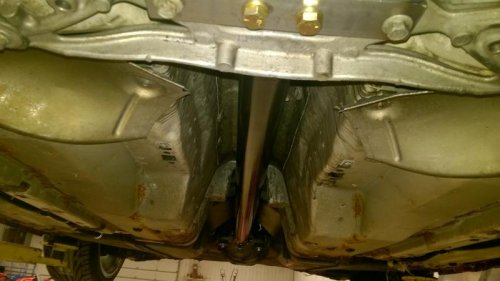
Installation of the linkage bolt allows me to throw in the driveshaft. After about 5 minutes of bolting up the driveshaft from Suburban Driveline, my power train was mostly complete.
WP_20160322_14_12_37_Pro.jpg

Happy with the progress. So tomorrow I'll tackle the slave/master for the clutch, fuel lines, and start the exhaust.

WP_20160315_12_30_18_Pro.jpg


WP_20160315_13_52_57_Pro.jpg


WP_20160315_13_56_24_Pro.jpg


WP_20160315_13_52_52_Pro.jpg


WP_20160315_14_10_43_Pro.jpg


WP_20160315_18_01_41_Pro.jpg


WP_20160315_14_11_03_Pro.jpg


WP_20160321_20_37_11_Pro.jpg


WP_20160322_13_24_47_Pro.jpg


WP_20160322_14_12_37_Pro.jpg
 
You finally got me to say "No... just no..."

But hey, nice progress otherwise. Imagine all the people suddenly asking you for parts had that Firebird been an LS

Yeah... It looked a lot better in my head when we were at Hobby Lobby. It would have the black suede already but my wife has been sick. I just wanted to get everything together, so I could move onto more important stuff. It will be black suede soon (ish).
 
Just put a "Hello, my name is... Captain Slow" and you'll be good to go. When this project comes together, the shift boot will be the least of my worries. Hell, I'd take it like that if it meant having a manual
 
Sure. Finished school but haven't finished up all of the FAA tests yet, had a baby boy, and moved. I still wrench on this with as many custom junkyard parts as possible. Trying to minimize cost. Upgraded to 2nd Gen headlights that need work, custom heater setup (good track overheating insurance), Brian has been working through the wiring, and other odds and ends. It's just slowly progressing like always. But the slow progress is usually at a huge $ saving.
 
Here is my more detailed update.
As is said during these long drawn out builds, x, y, and z happened. Well X was working full time while finishing up a double major and also studying all the time for the FAA Dispatch exam. The final test is scheduled for October 18th, so the fun still isn’t over.
Variable Y was moving back to Chicago and a long, long drive away from where the Lincoln is being wrenched on. I drive out once a week because of time constraints and…
Variable Z, which was Connor:
V__7E6D_zpslewt4qn4.jpg


Since I’ve updated my current excuses, I’ll cover what has actually been getting done (or not done) with this build.
Brian and I got everything buttoned up into the engine bay as you saw in the previous update. We started seeing and hearing rumblings of issues with using the 3sgte flywheel with the 1uz to CD00X transmissions. This was dismissed because I had paid extra for a modified one and we had spent days measuring out all of the variables (move one thing, it would affect the spacing of the: flywheel, input shaft, TOB, starter gear, etc). Months ago we turned over this setup out of the car on the pallet (with success), but this day we nervously hook up a battery and the starter to the installed set up. “It worked before. I’ll be fine.” The sound of the starter spinning on the stationary flywheel teeth echo through the shop.
The only difference on the pallet was that the spark plugs were out, thus zeroing out the resistance. Pulling and reinstalling the spark plugs in the car proved our fears. Searching the forums found some “solutions” and the fact that the person who sold this kit was being hunted down and was banned off of most of the forums.
starter_zps5sex4m5q.jpg


The reason so many people had purchased this solutions, was that many had gotten the setup to work… initially, but after 3-6 months they would have no more starter/flywheel teeth. We even went off the books with trying solutions, but to no avail.
modded%20starter_zps0azuce1c.jpg


I ended up talking to the administrator of the 1uz forums and his company makes a 3vz modified flywheel that is guaranteed to work. However all of our spacing is for the previous company’s setup. With the modified 3vz flywheel on the way, I’m sure more hopes and dreams will be crushed soon.
Now that we’ve taken the journey through the ugly, let’s lift some spirits and get the motivation going again. 2nd gen headlight mounts and HID’s on half off day? Check! Exhaust completely bolted up and looking good? Check! Turbo piping cut, welded, test fitted, heat wrapped, and installed? 95% check (waiting on one cold side intercooler coupler)! Custom heater setup for aiding in cooling the car? Check, with junk yard goodness and modifications to fit the 1uz water bridge. Entire underside of the car completed? Check (minus the flywheel issue)!
The car is on the ground again after many, many hours of wiring, soldering, testing, chasing down gremlins, and making it so it wasn’t short-out/start-on-fire-happy.
WP_20160914_001_zpsghip02hd.jpg


Now the interior is getting all of the attention. Of course some modifications are needed and doled out with great prejudice:
WP_20160914_16_21_54_Pro_zpstuv8pv5x.jpg


Everything else consists of running wires where they need to be, soldering, and moving on to the next component. This car is so smashed with “stuff” from the factory that it makes it very hard to work on routing and not screw something else up.
To be done soon: fuel rail 90* interferes with the throttle body and needs a solution, get the gauge cluster wired and installed, wire up the F8 panel to the HVAC (and other functions), flywheel replacement, steering wheel and seat installation, figure out why the brake lights don’t work, finish up the last coupler for the coolant system, wiring for (which is fairly involved) and placement of the LQ4 coil-on-plug setup, body kit installation/fabrication, windshield replacement, body work, paint, try to start the car and realize the ECU is bricked, cry, buy new ECU that doesn’t work with anything I have installed, and then start fixing the plethora of issues as they inevitably arise.
I have to say that I am getting really motivated with this car again. Each time at the shop, I am throwing away to do lists and meeting the schedule I make before heading over. I might be a glutton for punishment, but I really do enjoy working on this car. Go to junk yard, find obscure part by just poking around, modify it to work, repeat.
 
After nearly 3 solid weeks of studying, I now have my FAA Aircraft Dispatcher Certificate. So time restricting source number 1 gone. Now the issue is that my wife is back to work. I work Fri-Mon and wifey works Mon-Fri, so I am with Connor three days a week with zero days of overlap. Ordered a flywheel that was being "Shipped tomorrow" about 4 weeks ago. Throttle body, IC piping, BOV just need a few hours of work at the very most. The LQ4 COPs will 100% not work with my ECU, so I'm working on sourcing/cobbling together a new ignition setup. Other parts have been "shipping" for months from overseas. So many aspect of this build have been just waiting for parts. The interior is coming together and we hope to have something presentable next time I get out to the shop; the issue is that I have no idea when that will be.
Since ya'll like pictures. Here's the newest version of the MetSHO:
19A982C6-9C67-40BA-B1C7-8538681245E0_zpsplddwhut.jpg
 
This is awesome, so glad the car wasn't too far damaged in the fire. Congrats on the baby, new house (I think?) and the qualifications.

Can't wait to see more updates.

PS. Your picture link is broken in that last post.
 

Members online

Back
Top