New to me advice

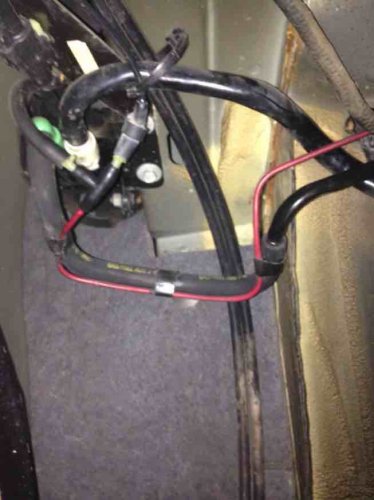
I used Cobra fuel rails with AN adaptors for the fuel line connections to the fuel rails and the filter and return line connection in the passenger side fender well.
 
Made some progress today.
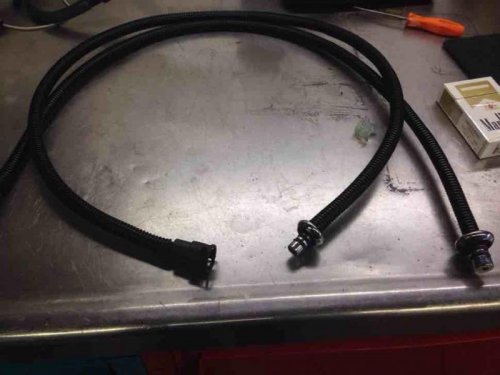
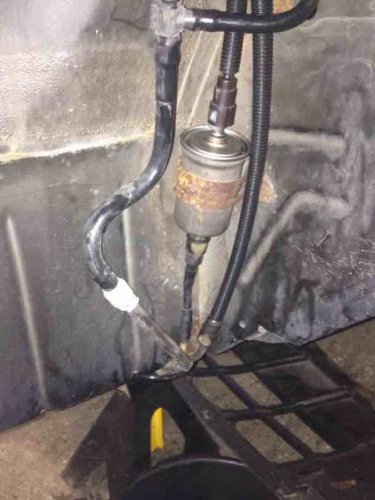
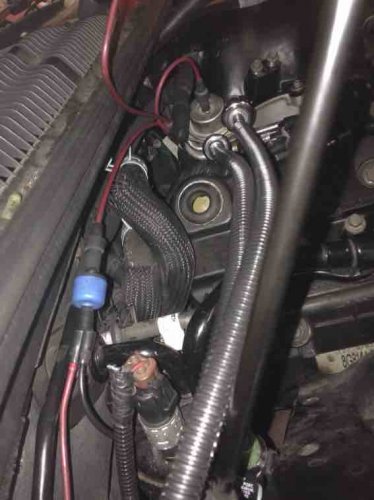
Pulled the Mark fuel rail and installed the cobra ones. Pulled the wheel well liner and pulled the stock lines out. Ran new plastic line from the wheel well to the rails. Didn't have to cut into the lines, factory connections for pressure and return. Reused the factory connectors and got the plastic line from napa. It took a little trial and error on the first fitting. Propane torch to warm the line.

Before
ImageUploadedByTapatalk1453593422.451955.jpg

New lines
ImageUploadedByTapatalk1453593454.993081.jpg

Installed. ImageUploadedByTapatalk1453593491.927088.jpg

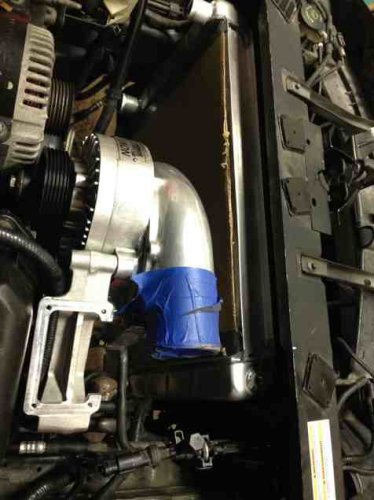
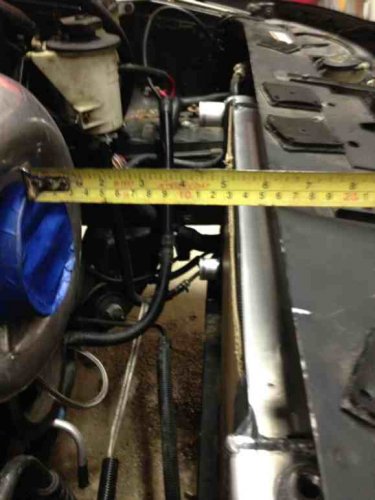
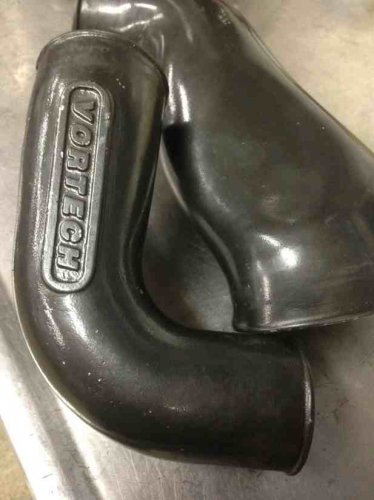
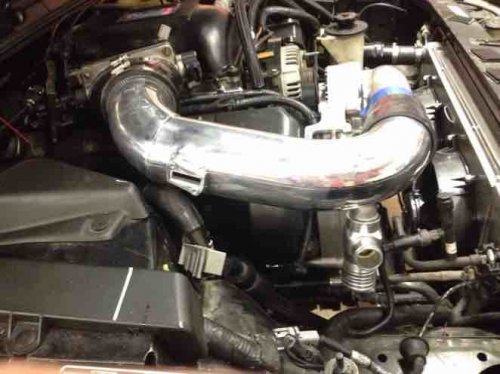
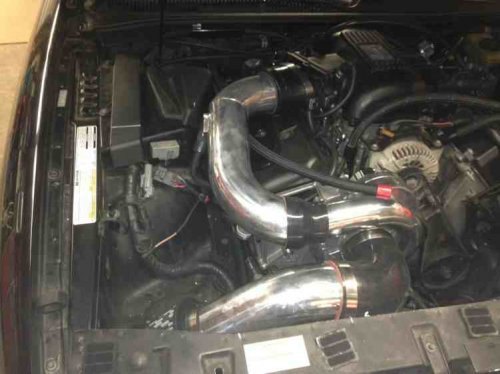
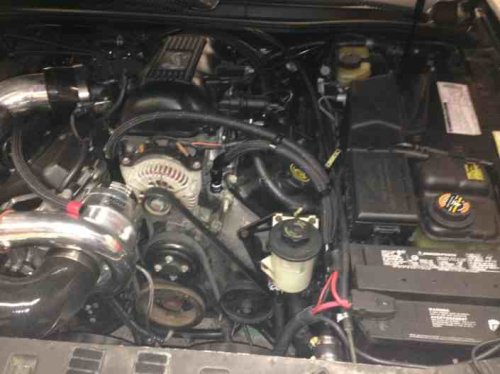
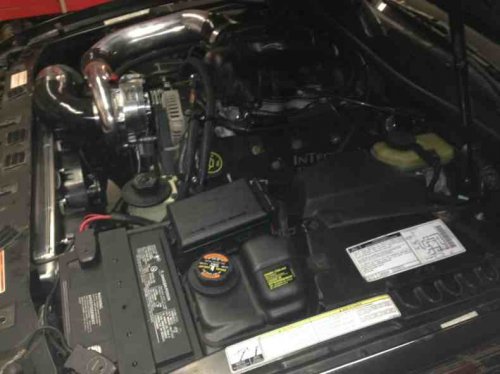
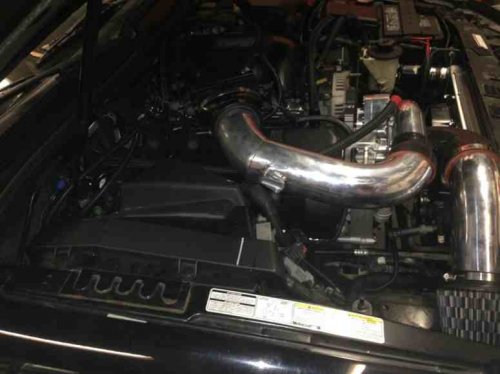
Next problem... I have a cast aluminum Vortech pipe from the SC to the intake. It doesn't fit like I was hoping. I could make it fit with some cutting and grinding.

Stuffed the lower radiator hose on and figured out how to modify the hose. Pretty easy.

Lengthened the TPS and IAT wires. Plumbed the vacuum lines.
ImageUploadedByTapatalk1453593734.526818.jpg
ImageUploadedByTapatalk1453593895.776816.jpg

Waiting for the inlet elbow to show up and we will see how that fits.

I must say this project is not for the timid.

ImageUploadedByTapatalk1453593422.451955.jpg


ImageUploadedByTapatalk1453593454.993081.jpg


ImageUploadedByTapatalk1453593491.927088.jpg


ImageUploadedByTapatalk1453593734.526818.jpg


ImageUploadedByTapatalk1453593895.776816.jpg
 
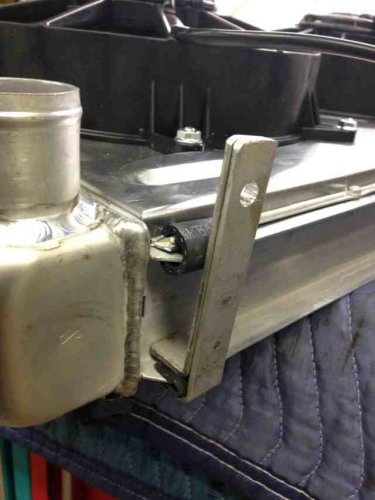
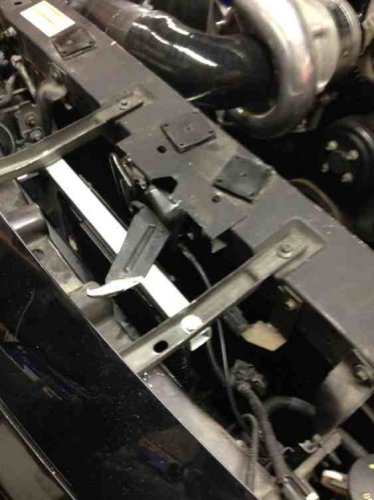
Tired of fighting the cooling system interference. I ordered a custom dual pass radiator yesterday. It will have inlet and outlet on the driver side and is short enough to fit under the header panel. Twin HP Spal fans that will push me we'll into the 3000 cfm range.

Any suggestion on the Sc outlet size? The boot for the TB has a 4" tube size and the SC outlet is 3"... I am really stuck here and really need some advise...
 
ImageUploadedByTapatalk1454770311.140757.jpg
ImageUploadedByTapatalk1454770326.516592.jpg
ImageUploadedByTapatalk1454770339.638289.jpg

Radiator installed last night..
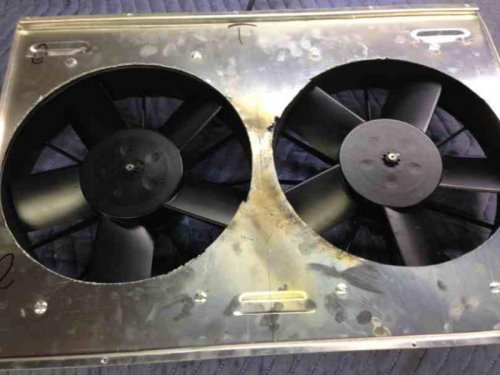
Got the radiator and fans from Dillion radiator. They did a nice job on the the radiator part. The fan shroud they kind of butchered the holes. Did an amp draw on the mark fan and the twins they put together. The mark pulled 20.8. The Spals pull 10.4 each.
ImageUploadedByTapatalk1454770528.537293.jpg

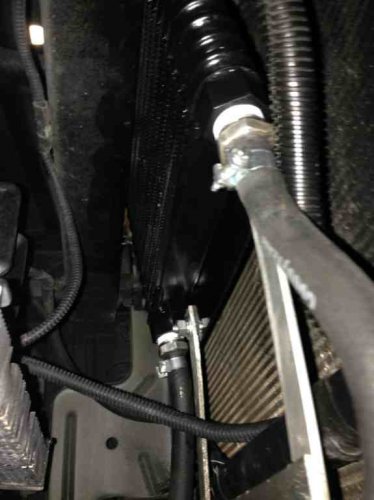
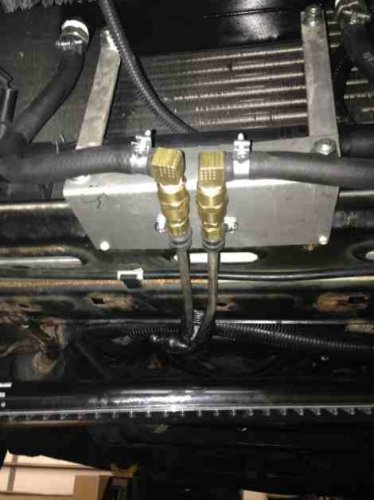
Off to the trans cooler and finish the coolant lines..

ImageUploadedByTapatalk1454770311.140757.jpg


ImageUploadedByTapatalk1454770326.516592.jpg


ImageUploadedByTapatalk1454770339.638289.jpg


ImageUploadedByTapatalk1454770528.537293.jpg
 
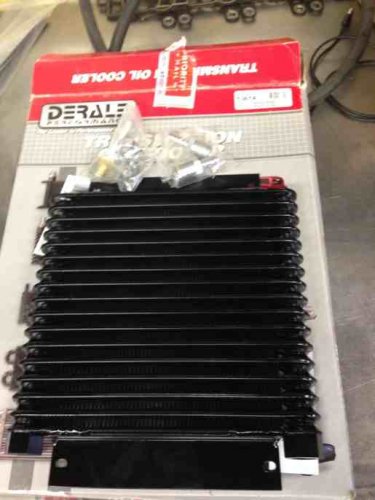
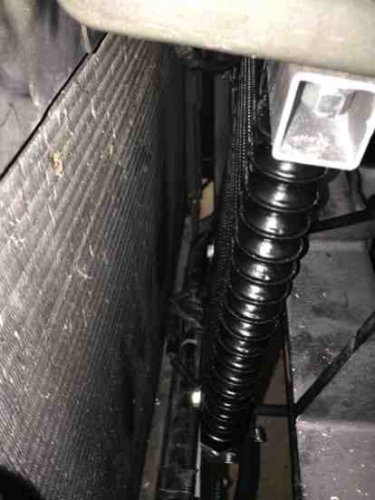
Trams cooler is mounted and lines are done!!! Turned out pretty good for a never has been...

ImageUploadedByTapatalk1454814277.325128.jpg
ImageUploadedByTapatalk1454814289.869700.jpg
ImageUploadedByTapatalk1454814300.849592.jpg
ImageUploadedByTapatalk1454814312.929872.jpg
ImageUploadedByTapatalk1454814333.266034.jpg
ImageUploadedByTapatalk1454814344.024787.jpg

Worked on the crossover delete lines this evening after a break from the TRANS cooler. The two main lines are done. I have to get different AN fittings to address the head cooling mod port. I need to straight and all I have left are 90s and 45s. Have I mentioned how much I hate putting them together?

I rant the bleed line off the opposing radiator tank over to the degas bottle. Installed the lower radiator hose. I had to patch it to the original hose off the degas bottle. That was easy, I used a 3/4 hose splice, basically a double barbed plastic fitting.

I will post complete pics when the cooling system is completely done.

The only major chore left is to fab the tubing from the SC to the TB. I don't get those fittings till Monday. :( I ordered them a week ago. I got some Alumaweld sticks to see if I can make it work. At the same time I have to figure out the mounting flange for the MAF sensor. I got a slot style and a harness. Still trying to find hose to finish plumbing for the IAC. Last but not least the blow off valve.... Any thing wrong with venting it to atmosphere?

Any body interested in these?
ImageUploadedByTapatalk1454815074.638641.jpg

ImageUploadedByTapatalk1454814277.325128.jpg


ImageUploadedByTapatalk1454814289.869700.jpg


ImageUploadedByTapatalk1454814300.849592.jpg


ImageUploadedByTapatalk1454814312.929872.jpg


ImageUploadedByTapatalk1454814333.266034.jpg


ImageUploadedByTapatalk1454814344.024787.jpg


ImageUploadedByTapatalk1454815074.638641.jpg
 
I might be interested in that intake tube.
I sent you a PM with my number. I have the plastic intake/inlet tubes as well.

Off work a little early today. Out to the garage and see what sense I can make out of the 3 1/2" discharge tubes that came in earlier this week. Wish me luck with the cutting and Alumaweld. Try and post pics latter tonight...
 
ImageUploadedByTapatalk1455322846.912527.jpg

Getting close. Wish I would have paid attention in geometry 30 years ago.

ImageUploadedByTapatalk1455322846.912527.jpg
 
ImageUploadedByTapatalk1455395166.510547.jpgImageUploadedByTapatalk1455395175.710415.jpg
ImageUploadedByTapatalk1455395227.543185.jpg

Here we go...

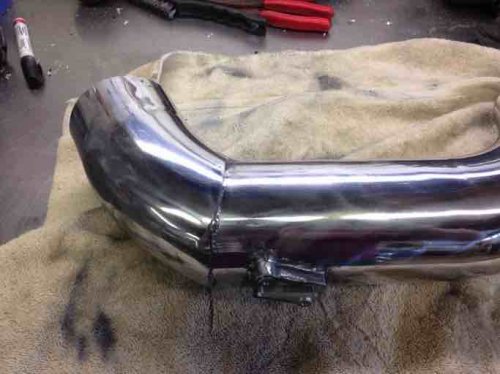
Alumaweld worked out ok. You have to hear the hell out of it!!!

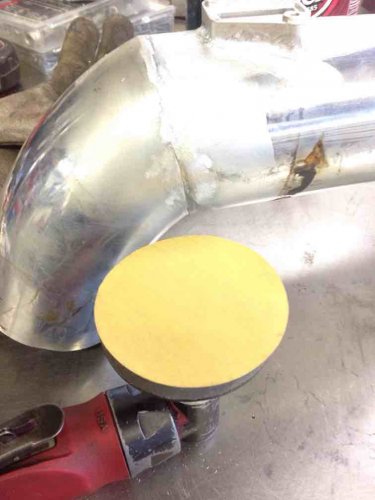
I did a quick cleanup on the welds with 80 on a 3" die grinder. Then hit it with 120 on a DA. Finished it off with 1000 on the DA and then used the paper left over from headlight cleaning kit.

I was hoping that the seams would have mated up better but it is hard to keep them in place.

I took it over to Larry and his associate at LRS Tuning in Lake Villa IL to see where he wanted the MAF. He thought it turned out OK..... As long as it holds. They had more concerns of the BOV location. That is next.... Waiting on the AN fitting to weld in for the IAC motor.

ImageUploadedByTapatalk1455395166.510547.jpg


ImageUploadedByTapatalk1455395175.710415.jpg


ImageUploadedByTapatalk1455395227.543185.jpg
 
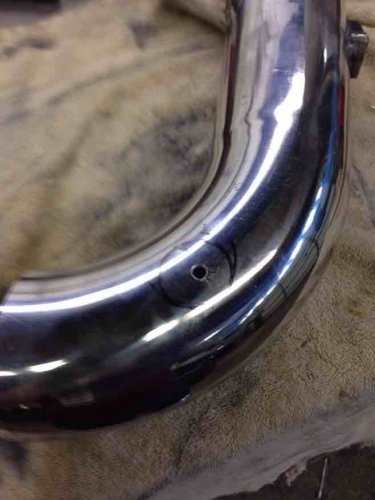
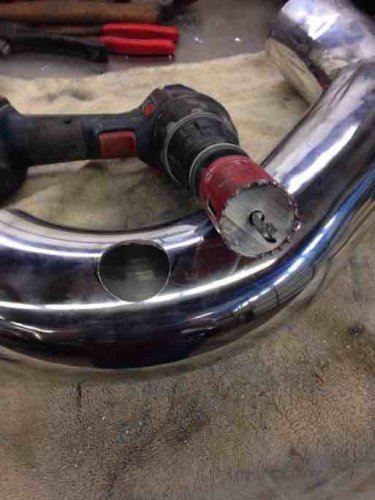
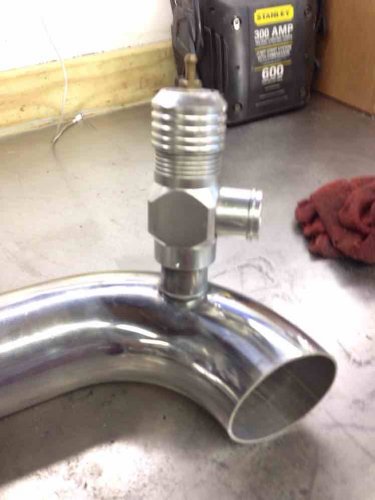
One BOV fitting installed. This one was tough to get to stick. It am not sure it is aluminum or something else. I had to take it off and put it in my blast cabinet. When I did that the two materials had the same color though. Anyway... After it cooled I pulled on it pretty hard and it did not budge.
ImageUploadedByTapatalk1455400807.567380.jpg

ImageUploadedByTapatalk1455400856.633887.jpg

Did a quick cleanup. This time I used a roll lock disc after I ground things down. I will definitely use the 1000 for final finish. It polishes out way faster and easier.
ImageUploadedByTapatalk1455400973.701672.jpg

ImageUploadedByTapatalk1455400986.001243.jpg

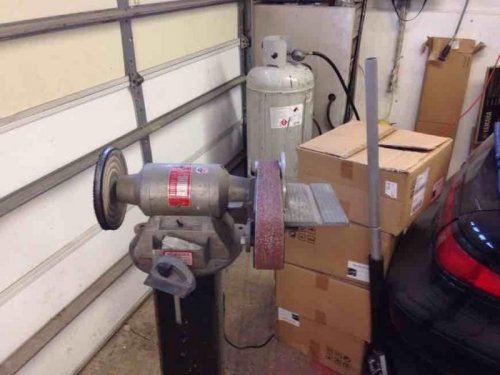
Pic of my polisher and grinder. And yes that is a house furnace I having running off of the propane tank.
ImageUploadedByTapatalk1455401111.250937.jpg

That's about it for today. Time to get ready and take the misses out for VD.

ImageUploadedByTapatalk1455400807.567380.jpg


ImageUploadedByTapatalk1455400856.633887.jpg


ImageUploadedByTapatalk1455400973.701672.jpg


ImageUploadedByTapatalk1455400986.001243.jpg


ImageUploadedByTapatalk1455401111.250937.jpg
 
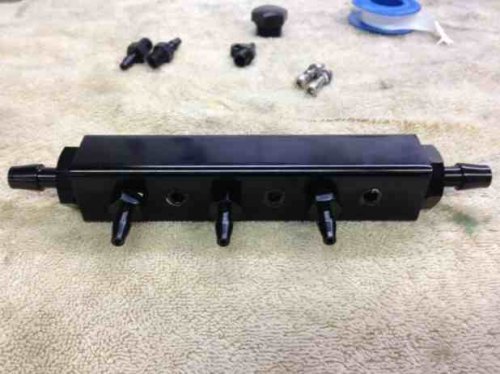
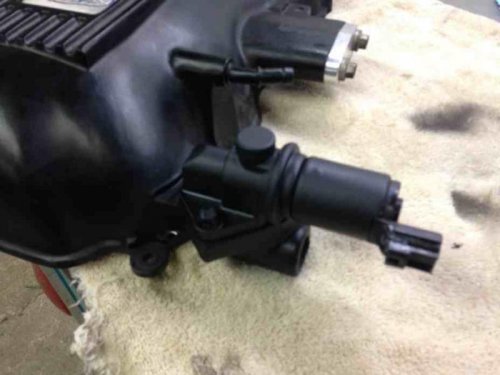
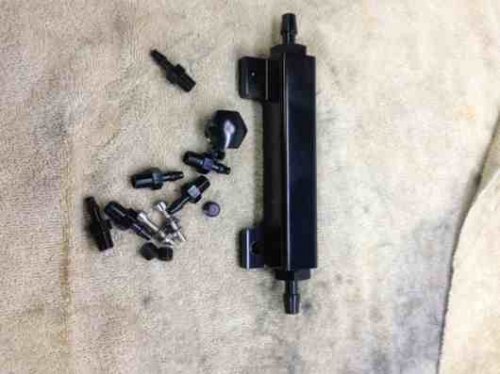
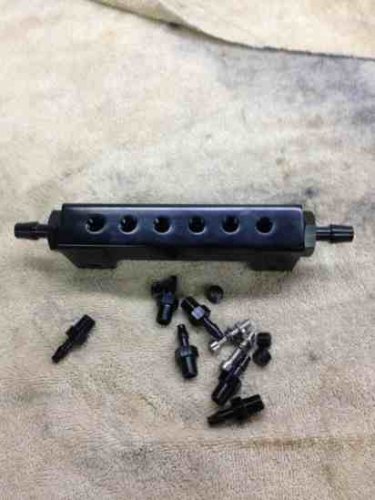
Didn't care for the way the vacuum lines were. I got this block off of eBay for $8-9.
ImageUploadedByTapatalk1455497876.489758.jpg
As you can see we have more than enough vacuum ports.
HVAC/EVAP - BOV- FPR
ImageUploadedByTapatalk1455497889.681840.jpg
ImageUploadedByTapatalk1455497900.790392.jpg
ImageUploadedByTapatalk1455497914.012761.jpg
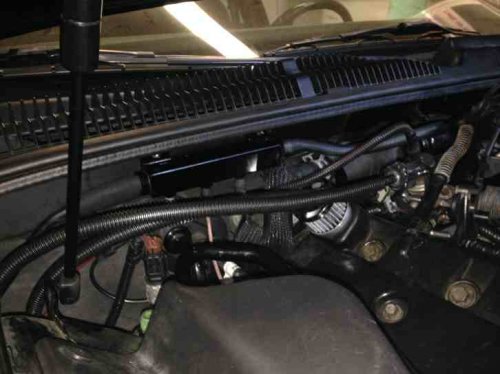
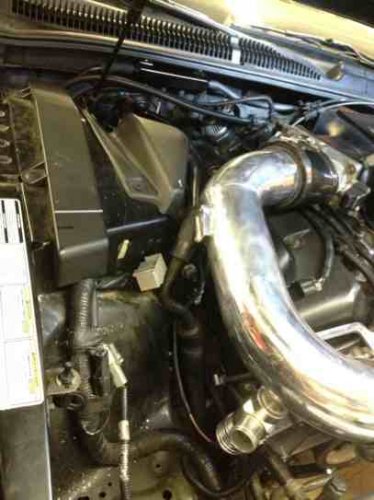
If you look real hard you can see the line for the BOV. I reused one of the lines left over from the AIR system(I think).
ImageUploadedByTapatalk1455498168.080446.jpg

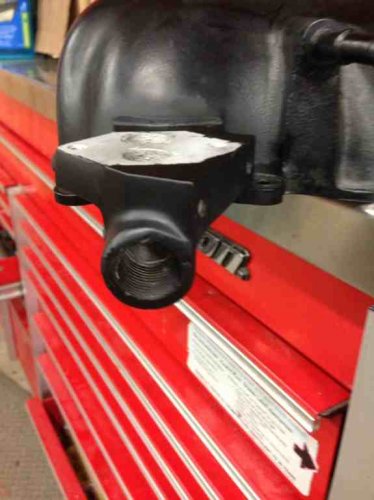
I pulled the tube out of the IAC port. Tapped to 1/2 NPT to prepare for the 10AN-1/2NPT adapter. I had to cut the deeper part of the hole with a carbide cutter to get enough depth for the tap. I touched up with flat black to match the powder coat. I did a test piece with semi gloss and flat black, I think eggshell may have matched a little better but I didn't have any.
ImageUploadedByTapatalk1455498222.796215.jpg

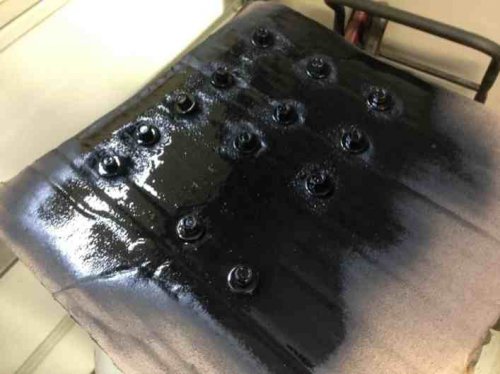
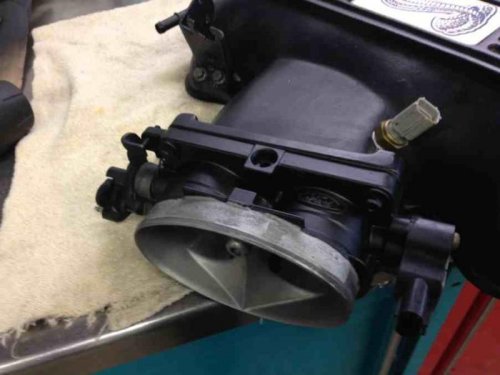
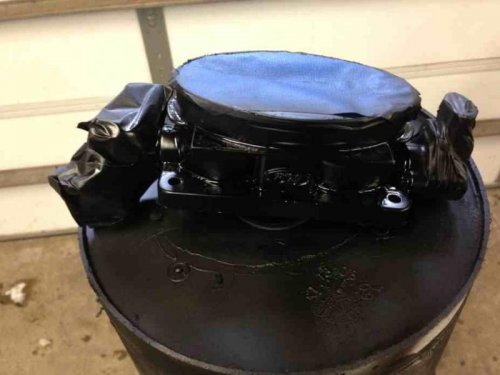
Pulled the TB and IAC motor and painted them to match the intake. I also painted the bolt heads. I didn't notice before, the bolts for,the TB, upper intake and IAC are all the same... I didn't do the EGR block off plate yet, it needs to get drilled and tapped for the boost gauge. The flat black matches pretty good and you wouldn't notice I don't think.
ImageUploadedByTapatalk1455498697.706476.jpg
ImageUploadedByTapatalk1455498738.993364.jpg

While the paint was drying, final assembly of the cooling system. Went old school and drilled a 1/8" bleed hole in the thermostat and stuck a pill to hold it open to help purge air.
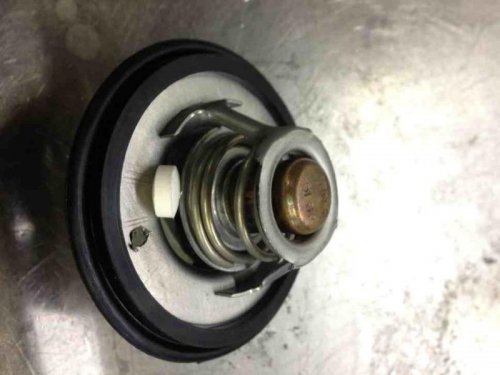
ImageUploadedByTapatalk1455498841.580694.jpg
Redneck AN fitting wrench...
ImageUploadedByTapatalk1455498884.514073.jpg

Intake together after the paint dried.
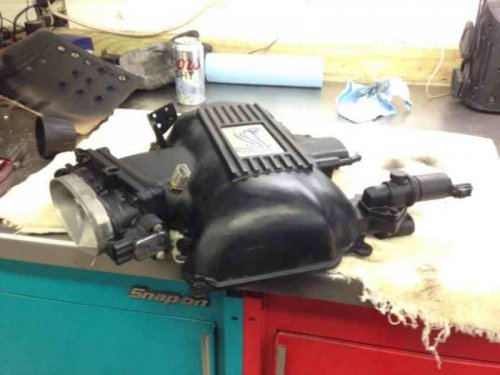
ImageUploadedByTapatalk1455498920.602533.jpg
ImageUploadedByTapatalk1455498934.400704.jpg
ImageUploadedByTapatalk1455498945.788574.jpg
Had a few fisheye problems but I think they buried pretty well.
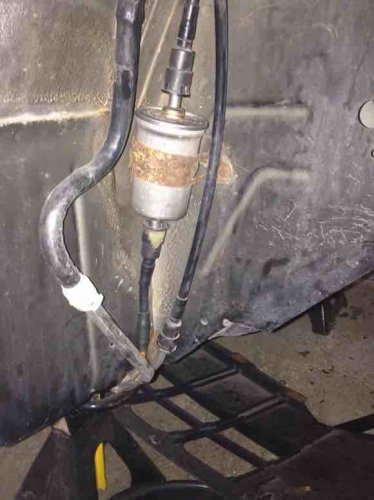
ImageUploadedByTapatalk1455497876.489758.jpg


ImageUploadedByTapatalk1455497889.681840.jpg


ImageUploadedByTapatalk1455497900.790392.jpg


ImageUploadedByTapatalk1455497914.012761.jpg


ImageUploadedByTapatalk1455498168.080446.jpg


ImageUploadedByTapatalk1455498222.796215.jpg


ImageUploadedByTapatalk1455498697.706476.jpg


ImageUploadedByTapatalk1455498738.993364.jpg


ImageUploadedByTapatalk1455498841.580694.jpg


ImageUploadedByTapatalk1455498884.514073.jpg


ImageUploadedByTapatalk1455498920.602533.jpg


ImageUploadedByTapatalk1455498934.400704.jpg


ImageUploadedByTapatalk1455498945.788574.jpg
 
Marked the clock position of the SC. I also marked it up to polish only the areas that are visible.
I may go back and sand a few spots and repolish. Most likely no one will notice yet alone care other than me. I have some other fittings to get into the odd spots but I think I'm going to skip it for the fore mentioned reasons. You really can't see in there unless you stick your face in there and look. If you do I will have to kick you in the b@lls and slam the hood on your head.
ImageUploadedByTapatalk1455499184.582328.jpg
ImageUploadedByTapatalk1455499195.495910.jpg
ImageUploadedByTapatalk1455499207.588344.jpg

One more weekend and off to the tuner I think...

Anyone hear, good/bad of ASSC or LSR Tuning in Lake Villa IL. His name is Larry and seems to have done A LOT of mustangs. He says to get 400 plus to the tire with what I have is not that hard. He said my biggest hold back is the lower-end, sound familiar? LOL

Scored a SCT X2 tuner for $80! Have that this week, I hope...

Until next weekend peace....

ImageUploadedByTapatalk1455499184.582328.jpg


ImageUploadedByTapatalk1455499195.495910.jpg


ImageUploadedByTapatalk1455499207.588344.jpg
 
I am really starting to like the stealth look. Not to black to death but I am considering taking the radiator out and hitting it with black paint. I really don't want to have to drain the coolant and do it later....

Any suggestions fellas?
 
Project is coming to a close... Didn't get to work on it last weekend and only a little the weekend before.

Don't have a pic, ground down the limiting hump on the belt tensioner. The mustang guys do this and I guess it helps the tensioner from bottoming out and blowing the tensioner. However after putting the belt on I don't seem to much extra swing. I do believe that if I wouldn't have ground the hump off I would have never been able to get the stock belt on. I am still using the Marks balancer and water pump pulley with the cobra belt.


ImageUploadedByTapatalk1456625876.316744.jpg
ImageUploadedByTapatalk1456625890.547307.jpg

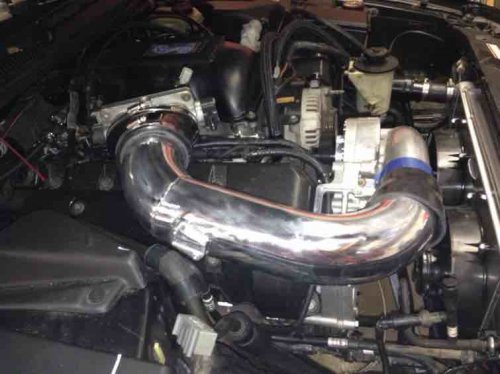
Bolted the Paxton to the Vortech bracket and sent it to its home, permanently. Oil lines and all that jazz. I am still waiting one fitting to come in. It is the one I need to weld into the discharge tube for the IAC. Everything underneath is all back together, air dam, support brace. Blah blah blah. Battery tray and battery back home.
Epoxied the Velcro pads back onto the beauty covers. Polished the inlet tube and secured the air filter. Tucked the extra wire for the MAF sensor under the plastic chase on the passenger fender.

Still holds fuel pressure. I drops about a pound after an hour. I can live with that.

Monday or tuesday I hope to get my startup tune. Get it fired up with coolant and check for leaks. I do need to run the wiring for the wide band and boost gauge. I guess I do have one little piece left of the project. Also drill and tap egr block off plate for the boost gauge. Should throw a coat of paint on the plate too so it matches the intake.

ImageUploadedByTapatalk1456626308.783439.jpg
ImageUploadedByTapatalk1456626321.751080.jpg
ImageUploadedByTapatalk1456626332.839787.jpg
ImageUploadedByTapatalk1456626347.907685.jpg
ImageUploadedByTapatalk1456626359.267983.jpg

ImageUploadedByTapatalk1456625876.316744.jpg


ImageUploadedByTapatalk1456625890.547307.jpg


ImageUploadedByTapatalk1456626308.783439.jpg


ImageUploadedByTapatalk1456626321.751080.jpg


ImageUploadedByTapatalk1456626332.839787.jpg


ImageUploadedByTapatalk1456626347.907685.jpg


ImageUploadedByTapatalk1456626359.267983.jpg
 
Here we go.....

Had to weld one last fitting. IAC into the discharge tube, just before the TB but after the MAF.

ImageUploadedByTapatalk1457150133.972778.jpg
ImageUploadedByTapatalk1457150146.453747.jpg
ImageUploadedByTapatalk1457150213.536238.jpg
ImageUploadedByTapatalk1457150227.669142.jpg

What do put in the place of the coil pack? Looks kinda out of place.
ImageUploadedByTapatalk1457150268.650351.jpg

ImageUploadedByTapatalk1457150133.972778.jpg


ImageUploadedByTapatalk1457150146.453747.jpg


ImageUploadedByTapatalk1457150213.536238.jpg


ImageUploadedByTapatalk1457150227.669142.jpg


ImageUploadedByTapatalk1457150268.650351.jpg
 
ImageUploadedByTapatalk1457150351.486750.jpgImageUploadedByTapatalk1457150362.935795.jpgImageUploadedByTapatalk1457150375.236050.jpgImageUploadedByTapatalk1457150384.952593.jpgImageUploadedByTapatalk1457150394.853718.jpgImageUploadedByTapatalk1457150418.068548.jpg

Vacuum block. To my surprise it worked well.
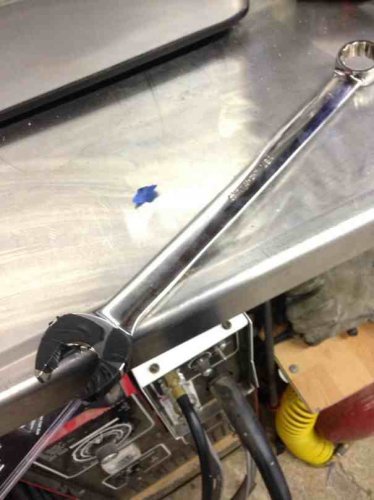
ImageUploadedByTapatalk1457150434.751872.jpg
ImageUploadedByTapatalk1457150504.353005.jpgImageUploadedByTapatalk1457150520.852538.jpgImageUploadedByTapatalk1457150537.102482.jpgImageUploadedByTapatalk1457150552.253164.jpg

ImageUploadedByTapatalk1457150351.486750.jpg


ImageUploadedByTapatalk1457150362.935795.jpg


ImageUploadedByTapatalk1457150375.236050.jpg


ImageUploadedByTapatalk1457150384.952593.jpg


ImageUploadedByTapatalk1457150394.853718.jpg


ImageUploadedByTapatalk1457150418.068548.jpg


ImageUploadedByTapatalk1457150434.751872.jpg


ImageUploadedByTapatalk1457150504.353005.jpg


ImageUploadedByTapatalk1457150520.852538.jpg


ImageUploadedByTapatalk1457150537.102482.jpg


ImageUploadedByTapatalk1457150552.253164.jpg
 
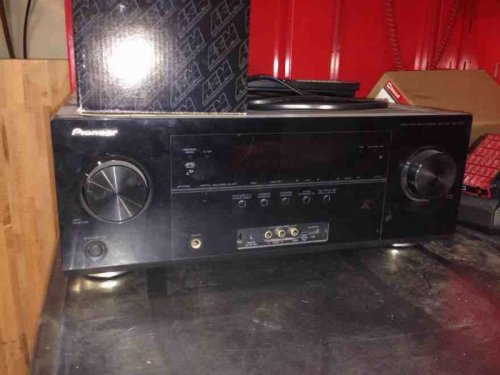
A casualty of the project. My pioneer receiver took a ****.
ImageUploadedByTapatalk1457150617.952053.jpg
I have been a pioneer guy forever. It was 4 years old. Don't get me wrong I jammed the hell out of it but....
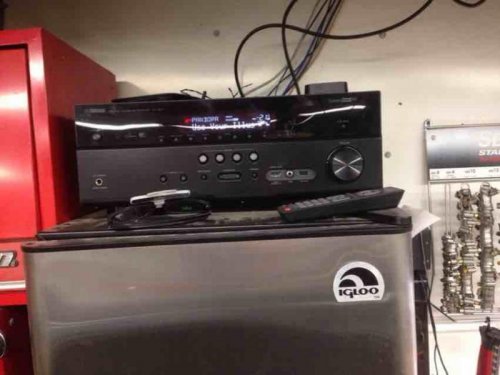
Replaced it with a Yamaha and could not be happier. I especially like that it has Pandora link built in.
ImageUploadedByTapatalk1457150764.321467.jpg

The only thing I really have left is to install the boost/wideband.ImageUploadedByTapatalk1457150836.120534.jpg

Not sure what I want to do for mounting yet. Thinking a a single dash mount pod. Going to get the wires and tube ran for now and go from there.

ImageUploadedByTapatalk1457150617.952053.jpg


ImageUploadedByTapatalk1457150764.321467.jpg


ImageUploadedByTapatalk1457150836.120534.jpg
 
What does it cost to do this? Not sure I want to add it all up but the big pieces are this off the top of my head in round numbers....

Used Paxton 1500 with BOV- $1200
SC Mounting bracket,hose kit with bolts and belt- $400
New tensioner and idler pullies (mine were loose and old)- $30
Radiator and Fans - $500
Coolant crossover delete and head cooling - $300
Inlet and discharge tubing, boots, clamps, air filter - $150
29,000 GVW Trans cooler - $40
Slot MAF, PnP harness and weld-in mounting flange $75
Alumaweld $20
I had the polishing wheels and compounds to make the tubing and SC prettier.
98 GT lower hose, 170 thermostat and O-ring $20
Cobra Intake with TB, gaskets with DIY delete plates $260 - Fing stole it
Cobra fuel rail $30
Plastic Fuel line and adapters to adapt cobra fuel rail $20
47 LB Ford racing injectors M-9593-LU47 - $230
Aeromotive 11142 340 LPH fuel pump $90
Junk yard fuel pump hat from older Mark to adapt pump $25-30
Miscellaneous little stuff I had (silicone sealant for example) and random little stuff acquired along the way: scrap vacuum hose, scrap metal to make EGR delete plugs and various brackets and so on?? - $20?
The final tune is open at this point but I am expecting around $5-650
Used SCT X2 - $80
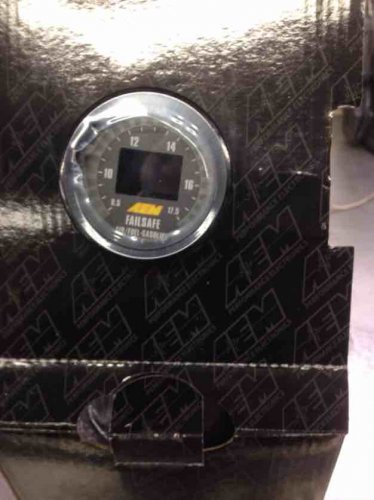
AEM 30-4900 boost/wideband gauge - $230 Mounting TBD.
100LB tank of propane for the garage furnace.... Twice. - $180 total. Had Christmas, New Years and Super Bowl party over flow in the garage. Not to mention LVC posting time[emoji3]
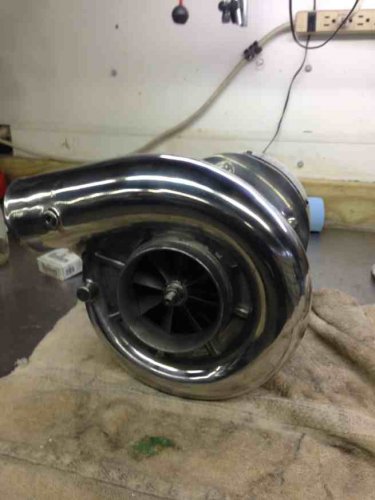
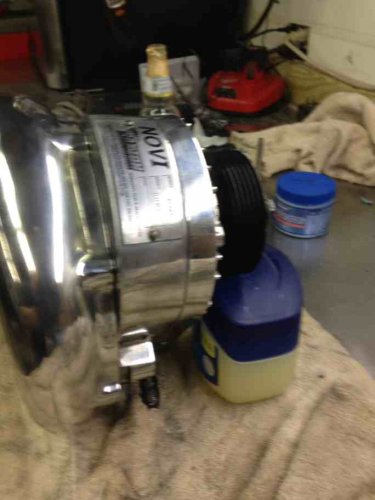
New Yamaha receiver doesn't count but....$260 from Amazon.
Beer, cigarettes, ass chewing from the wife, pride to say I did it all by myself with no physical or mental help (other than LVC commentary of course!)... Priceless....

Would I ever do it again? I think so. Would I buy a SC kit with all the pieces? No Fing way. I would piece it together like I did. Primarily because I don't care for how the discharge tubing fits. I am sure I could of made the cast aluminum pieces from Vortech fit but it would of bugged me forever.
I do wish I had the tig kit for my welder so I could do a better job with the tubing and MAF flange. I do have the spool gun for aluminum. Based on past experience thin stuff like the tubing is a PIA. I am sure if I did it regularly it could turn out better.
Along the lines of welding/soldering the aluminum... I would have ordered a thinner rod so it would be easier to work with. Don't get me wrong it worked and was painless but....
 
What does it cost to do this? Not sure I want to add it all up but ...

LOL, I keep a rolling price list while doing projects but once it's done, I destroy the list. ;)

Seriously, it looks good. I hope it performs to your expectations. :Beer
 
Goes to the tuner next week, I hope. Suppose to pick up a base tune sometime this week. Then I can run her enough to fill with coolant and check for leaks. I couldn't resist at least trying to start it and give a little RPM.


https://vimeo.com/157967197
 

Members online

No members online now.
Back
Top