What did you do to your LS today?

The eBay seller relists the item one at a time. Search "Lincoln LS right 15500" and it should be the first result. $35 shipped. Same for the high brake. Both were found under the "lightning and lamps > other" section. The Euro light even came in a Motorcraft box.

Honestly though, having one light is probably worse than having none... the search turned from "one day I'll find a set" to "needitneeditneedit where is it where is it where is it where is it search search search"

I got mine yesterday. I feel your pain. I bet they have whole sets and are getting people hooked on one piece and then will charge $5,000,000 for the other 3 pieces once they sell off these. Kinda like the drug dealer on the corner...........the first one is always free.
 
Came early. Gen 2 3rd brake light and right-side Euro trunk assembly. It has a 3157 bulb in place of the 168 and has an extra 3156 bulb in the clear half. Extra reverse light to make up for the Euro license surround rear fog?

View attachment 828472031

Seriously man!, like I need that, how much? make it a pair and I'll double the price!
 
Found a pair of 1st GEN inners yesterday, trouble was they were attached to some ones parked 2002 LS.
 
What, a pair of Euros? Get in line... or gear up for a bidding war

Yeah cause I just paid off the credit card and am saving it for a bidding war when that left inner comes up. :p I suspect that they are never going to be found though.
 
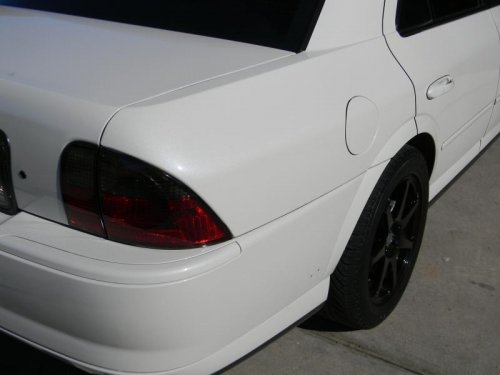
I tinted the tail lights. Never have done that before so they turned out a little bubbly if you look real close, but I pulled up behind the LS in my other vehicle today as close as I could and don't see the imperfections from the drivers seat behind the car!

I wanted to get the lightest tint I could find and that ended up being 10%. Just a subtle smoke look. This is about what I was hoping for.

Decided to de-badge it while I was back there. I figure we don't need those chrome letters back there on my black and white color theme. RightRearWtint.jpgPassRearQuarter.jpgDSCN7676.jpg

RightRearWtint.jpg


PassRearQuarter.jpg


DSCN7676.jpg
 
you can tint them with oracal 8300 light film to hide the "offness"

Or buy the "tinted" versions on ebay. They're not really tinted, they just have a black back half. Could also cut them open and line the backing with aluminum tape to give the same metal-through-clear-plastic-diffuser sequence
 
Or buy the "tinted" versions on ebay. They're not really tinted, they just have a black back half. Could also cut them open and line the backing with aluminum tape to give the same metal-through-clear-plastic-diffuser sequence

Yes but then I would have to deal with that douche bag of a seller on ebay that I vowed never to make a purchase from due to lack of respect for customers. I can't just give up on my convictions like that. Maybe I will just tint them.

The corner lights I have are used and are yellowed due to the elements.
 
Am I the only one not able to see pictures randomly? WTF?
no picture.jpg

no picture.jpg
 
Am I the only one not able to see pictures randomly? WTF?

Sometimes I get hotlinks that say "Attachment 83680437" and link me to pictures that were previously embedded in the post, but they never entirely disappear...
 
sometimes i get the little boxes instead of pictures, but a refresh fixes it.
i blame my internet usually.
 
I experience this on my work PC, my Ipad, Iphone and home PC. So its not just one place that I get this.
 
I tinted the tail lights. Never have done that before so they turned out a little bubbly if you look real close, but I pulled up behind the LS in my other vehicle today as close as I could and don't see the imperfections from the drivers seat behind the car!

I wanted to get the lightest tint I could find and that ended up being 10%. Just a subtle smoke look. This is about what I was hoping for.

Decided to de-badge it while I was back there. I figure we don't need those chrome letters back there on my black and white color theme. View attachment 828472077View attachment 828472078View attachment 828472079

Looks REAL good man, this is what I was going for but when they got returned to me they were way too dark for my liking.
I downloaded your last picture and saved it, so I have a good reverence to go by.

What did you use to get this result? I had mine done by a neighbors custom shop whom also did all my bumper cosmetic restoration, the finish on the tint is like glass, completely clear and smooth, just the shading of tint got hit too dark or too many layers.

Thanks!
 
Nice day today, starting to look a whole lot like summer around here now, decided to remove the cover off the LS, took it up and around the block, let her warm up, did the old side to side to wake up the steering & suspension, finally slowly began to open it up a little, to eventually full bore wide open on the straights, feels good. Got hard on the brakes couple times, those R1 Concepts rotors w/ Akebono EURO pads do make a huge difference no doubt.

Was great to get her out and run a little, took note of items I want to get to this summer with respect to mostly interior work. Bit more lighting and black out the window trim.

Overall great ride!
 
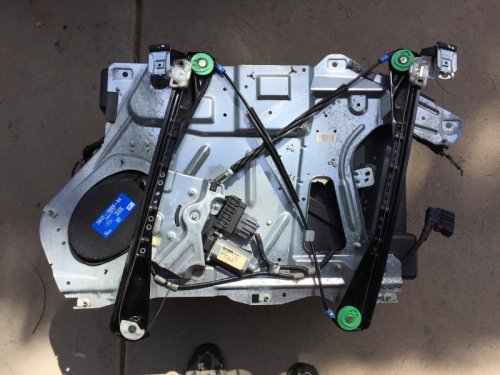
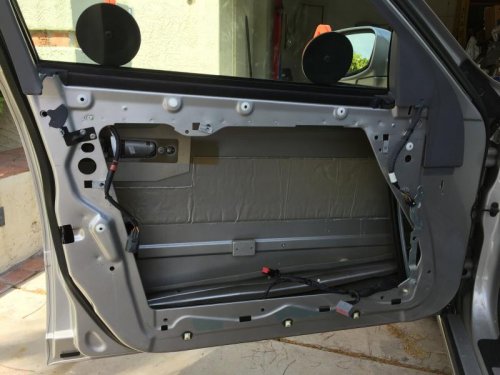
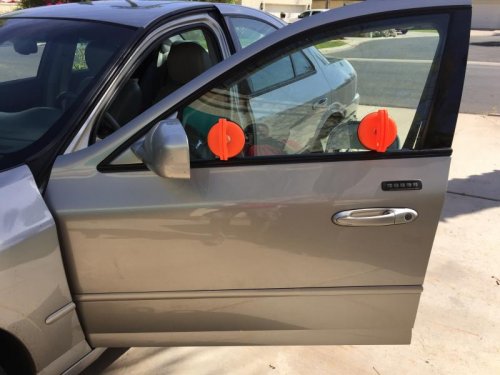
Fixed my driver side window track (3 broken tabs, but glass did not fall in)

IMG_1642.jpgIMG_1640.jpgIMG_1639.jpgIMG_1649.jpg

IMG_1642.jpg


IMG_1640.jpg


IMG_1639.jpg


IMG_1649.jpg
 
Engine oil out....new oil in....wiped off motor...checked oil level...good...parked...jumped on the Ducati :)
 
Just got a nice 06 Blk/Blk low miles w/ Navi to join the 02 Sport V8 I've owned for awhile.. The seats had a few minor white scratches in it that I hated. Just went out and cleaned, reconditioned the seats, conditioned with leather cream, and paste sealer.

They look like 10k miles now. Forgot to take before pics. Sorry. But this is the passenger seat after. The Driver seat is still conditioning and drying.

image1.JPG


image2.jpg


image3.JPG
 
That looks great, what did you use on that?
 
That looks great, what did you use on that?

Ill take some before and after's of the back seat. Finished the fronts. Both Front now finished. Look like only 10k miles seats.

Going to do a write up. Heres what you need.

Black Ritz dye. ( CVS or Walgreens)
Black Thick Permanent dye marker.
Soft foam dishpan scrubber.
Dollar Store Dollar Tree $1.00 Spray bottle Cleaner degreaser.
1 Bottle Maguire's Leather Conditioner
1 Can of Kiwi Leather Conditioning paste sealer ( Walmart, CVS, Walgreens)

Heat Seats to open Leather pores.

-Clean seat Leather with soft rag and 1/4 part degreaser/water.

-Very Lightly Scrub with Dishpan scrubber with 1/4 part degreaser.

-Re-wipe with warm clean water and clean rag to remove any soap left on.

-Fill in white spots and worn spots and creases with Permanate marker. Let dry for about 1-3 mins.

-Lightly Rub spot in and blend in with seats. (Using latex gloves agitate leather worn spots and white scratches)


- With Clean rag clean off excess marker color and blend in seat with damp rag and 1 spray of Degreaser.

Let dry about 5 mins.

Go back and using figers with Gloves blend in Ritzs dye in seats and in worn and white scratched areas.
-Let dry about 5-10 mins to soak/dye in.

-Go back with 1/4 Degreaser to water in blend in color so that it has just gotten into dye wear and scratches.

Let dry about 1-2 mins and go back with marker, and next Ritzs dye again looking for areas that need attention again. Wipe again let dry and look.

When you are satisfied with result. Using light pressure and motion, use a liberal amount of Maguire's Leather Conditioner on a clean rag. (Careful not to wipe and clog the holes in the leather perforation) Hot seats help this!

Let dry about a hour. Go back and do Maguire's Leather Conditioner again. Let dry in heat, ( Hot sun car closed, Car heat full blast as long as you can and seat heaters.)

Last apply a Liberal 2 coats of Kwik Paste leather conditioner 2x's let sit or in heat as long as you can. Finally apply Maguire's Leather Conditioner with a clean rag again, then use a soft clean dry rag to wipe off shine and into leather to seal.
 
Pulled the PCM from the POS, sending it out tomorrow. Ordered new COPs and plugs to be on the safe side, so whatever killed the PCM won't kill the repaired one before I sell it in a few months. Won't be back on the road for a couple of weeks though, due to the way my job works.
 
Pulled the PCM from the POS, sending it out tomorrow. Ordered new COPs and plugs to be on the safe side, so whatever killed the PCM won't kill the repaired one before I sell it in a few months. Won't be back on the road for a couple of weeks though, due to the way my job works.

Glad to hear! You'll get the PCM back very quickly but their communication sucks. The only thing you will see from them is a tracking number and no updates, unless you call or look at the repair slip in the package when you get it back.
 
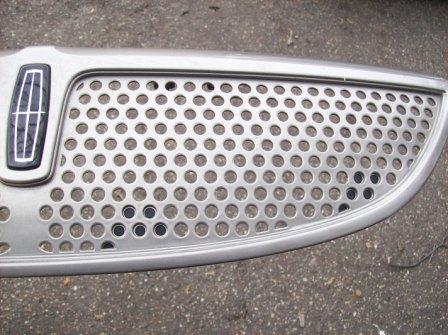
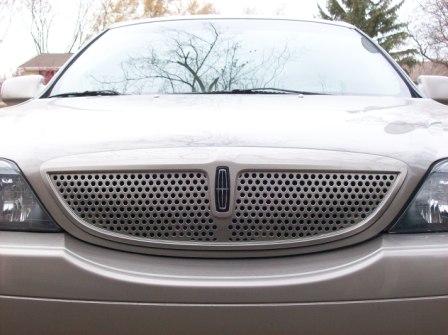
the Mclaren looks great, but there is one thing i usually will recommend to McL owners... one thing that always drives me crazy with those grilles are where the mounting tabs are, there are a bunch of holes that are filled in, and while I know some of the holes are filled so there is something for the mounting tabs mount to... but not all of those hole need to be filled and a few of them can be drilled out.

I hear you. For my McLaren Grill I bought some blackout tape and used a paper hole punch to create some black circles of blackout tape. Then applied them where the tabs are. 105_0615compressed.JPG

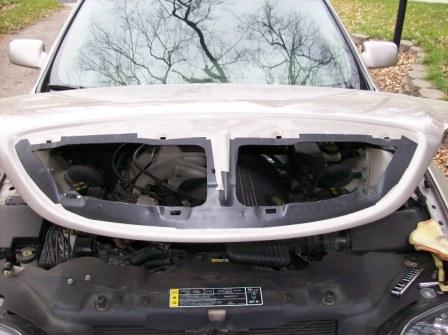
With the lighter color LS I also put blackout tape behind the grill on the supports behind the grill so the lighter color of the car would not show through.105_0616compressed.JPG

It solved the issue with the tabs showing through on the grill.
105_0613compresse.JPG

105_0615compressed.JPG


105_0616compressed.JPG


105_0613compresse.JPG
 

Members online

No members online now.
Back
Top